.png)
.png)
.png)
.png)
Updating a Home on a Budget? Don't Be Afraid to DIY
If you’ve just purchased a home for the first time but don’t have a massive - or even modest - remodeling budget, you don’t have to live with the outdated decorating choices any longer than necessary. Here’s how we made our house look great with weekend projects and a few hundred dollars.
When we bought our home with the help of our amazing realtor Heather Numerosi (and guidance from her realtor partner Patty Knaggs), we needed to make big changes to update our adorable home. The previous owners had built the cape-style home in the early 1960’s and lived there for the rest of their lives. They clearly had pride of ownership and had kept it immaculate and in fantastic condition, but it had not been updated or renovated since 1979. The living room, unheated porch, and bedrooms had blue berber carpeting over hardwood floors, and the kitchen, porch, and living room had faux wood paneled walls. I had told Patty Knaggs a few years back I wanted a home Grandma was selling rather than one that had been updated in a style I didn’t care for - and I finally had my wish!
Project 1: Take Up The Rugs and Paint!
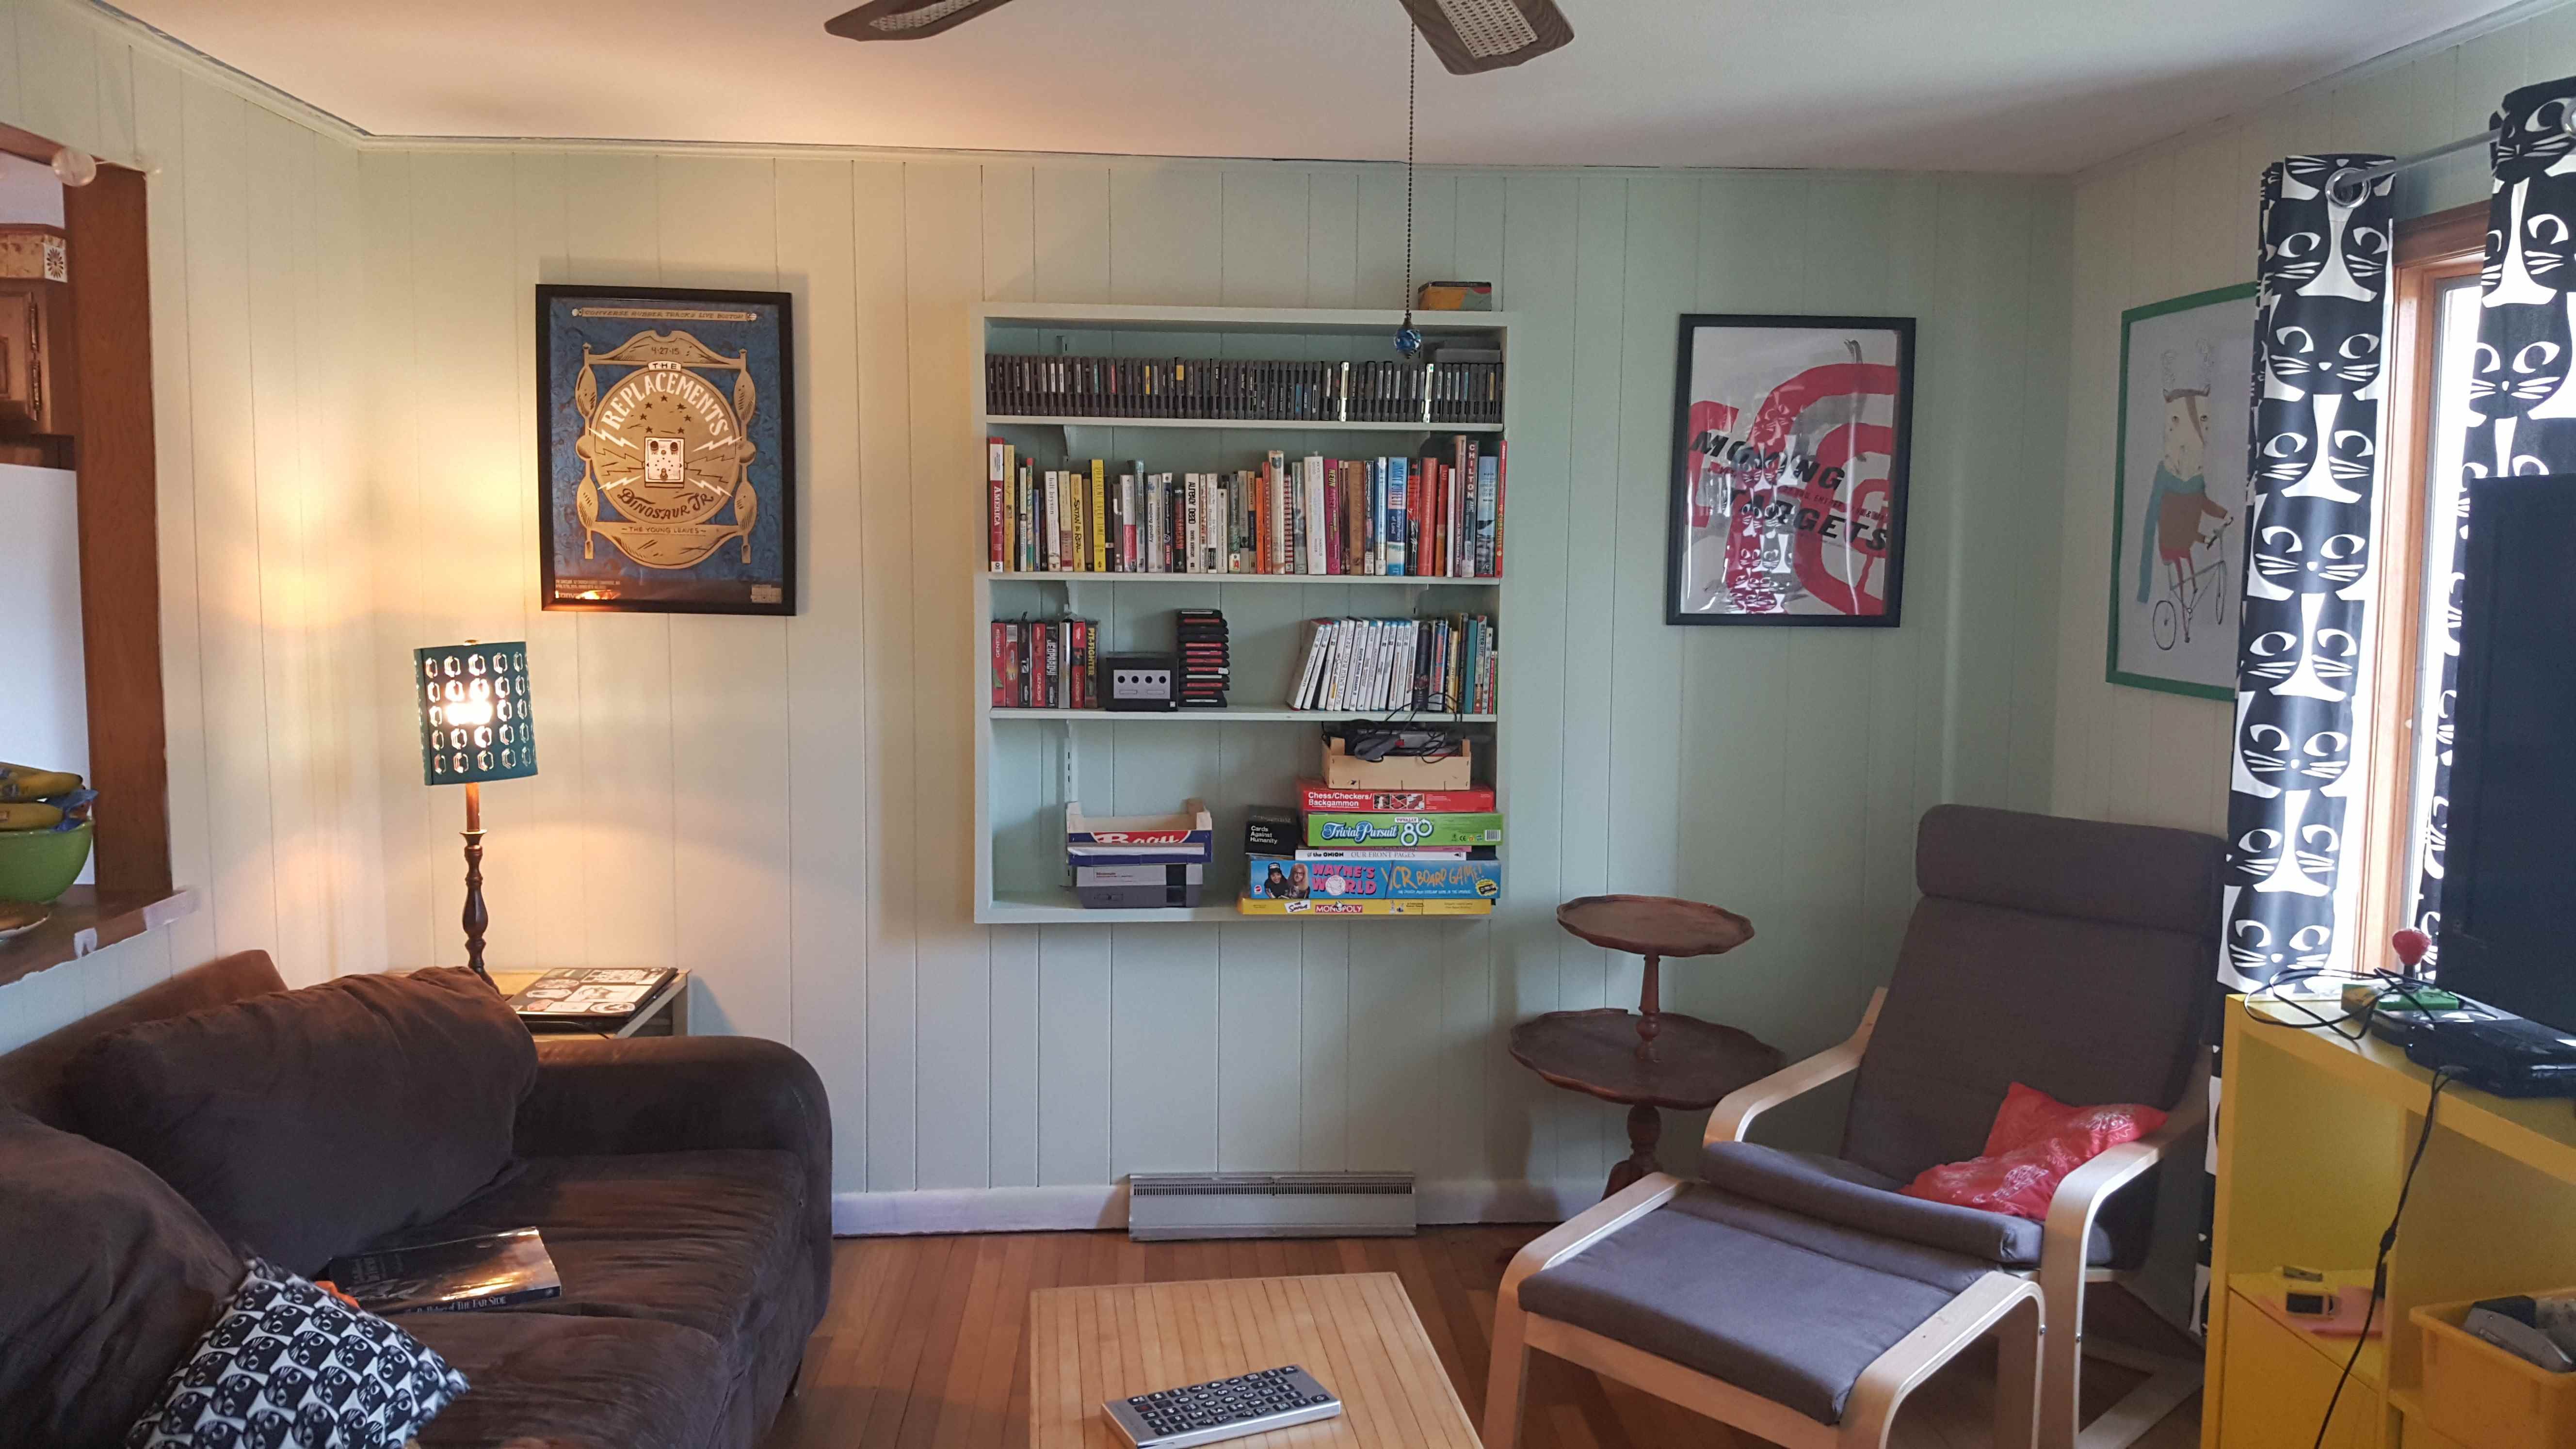
We started our first DIY project the afternoon we closed - my husband and a friend began ripping up the carpet and pads in the bedrooms and hallway and painstakingly pulling out the tack strips and staples, while in the living room I got to work priming and painting and let the rug stay as a dropcloth. We didn’t have the budget, time, or inclination to remove the paneling. Removing could have caused damage to the underlying drywall, and we weighed the benefits against the possible drawbacks - and left it as-is.
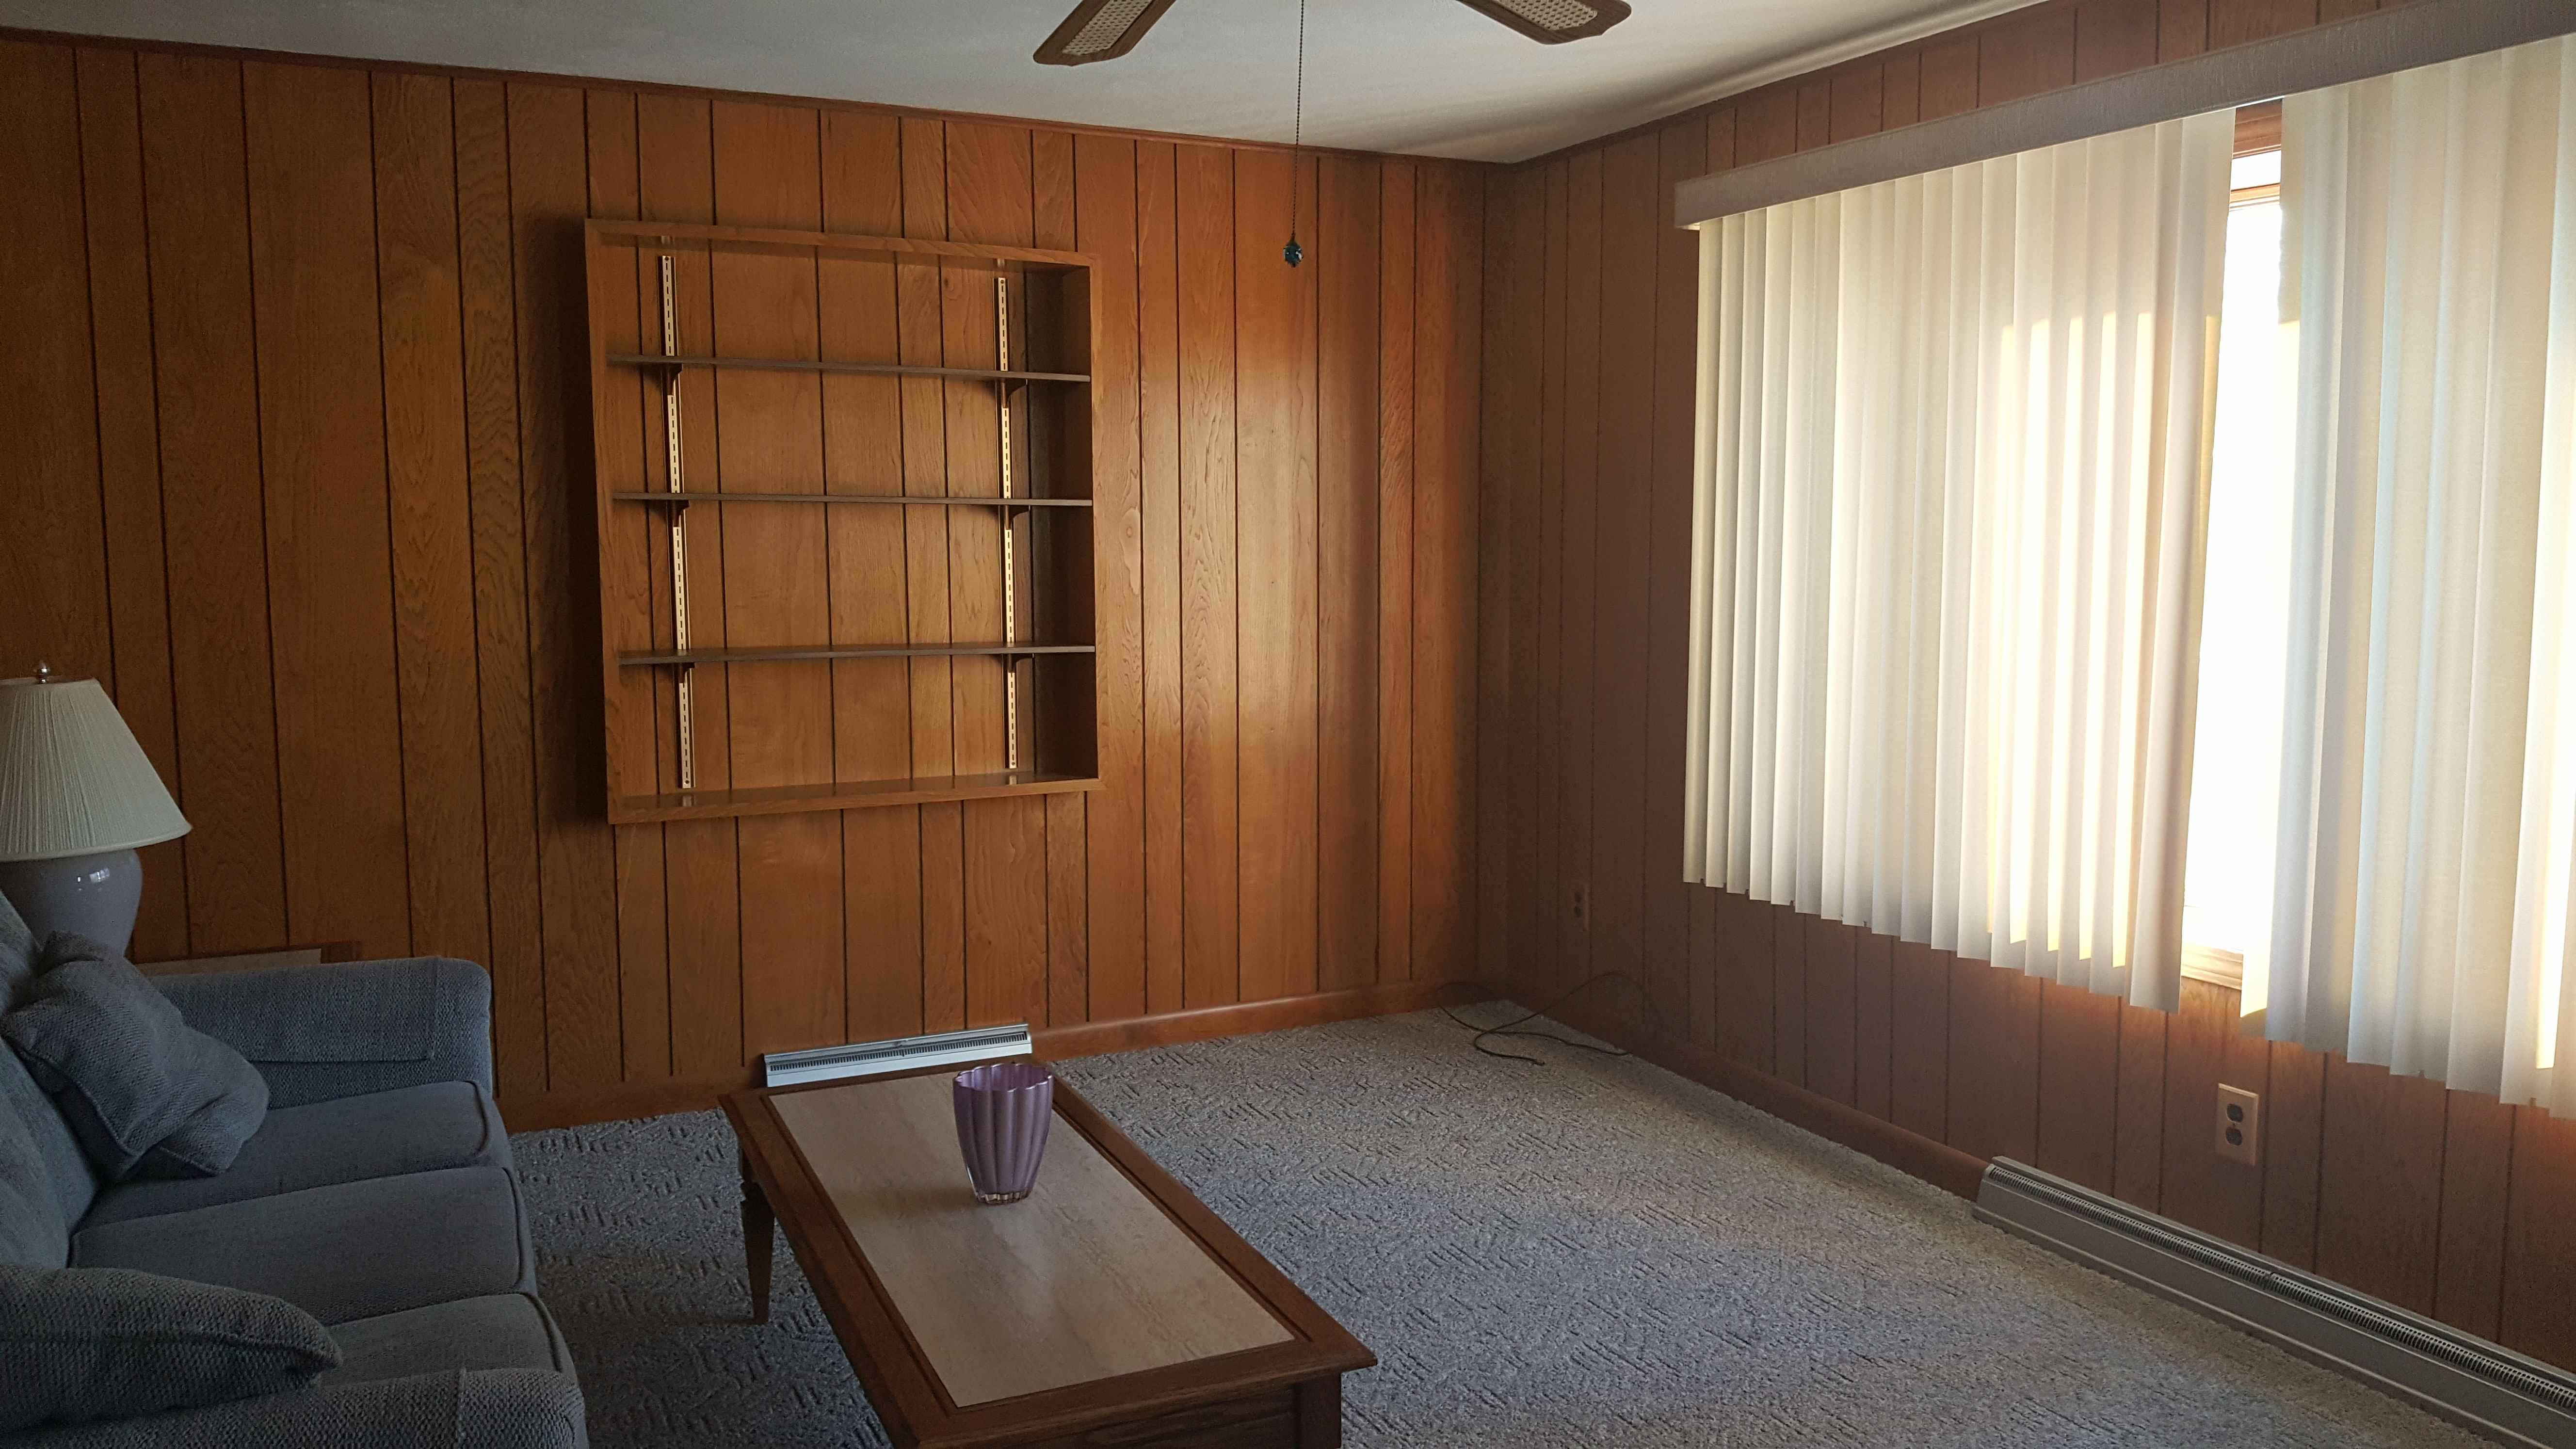
The living room when we moved in was terribly dark despite facing south with a fabulous bay window - so I chose a very light mint green to bring in some sunlight. It worked! It also looked better than I could have imagined on the built-in bookcase in the living room, which before had looked very dated. Removing the blinds and replacing them with curtains gave me more options with how much sunlight to let in.
A week after closing, the painting was done - and the beautiful hardwood floors under the carpet didn’t require any refinishing at all!
The entire living room makeover project took a long weekend and about $200 for paint, supplies, and a long curtain rod.
Project 2: Use More Paint to Update the Kitchen Cabinets and Backsplash.
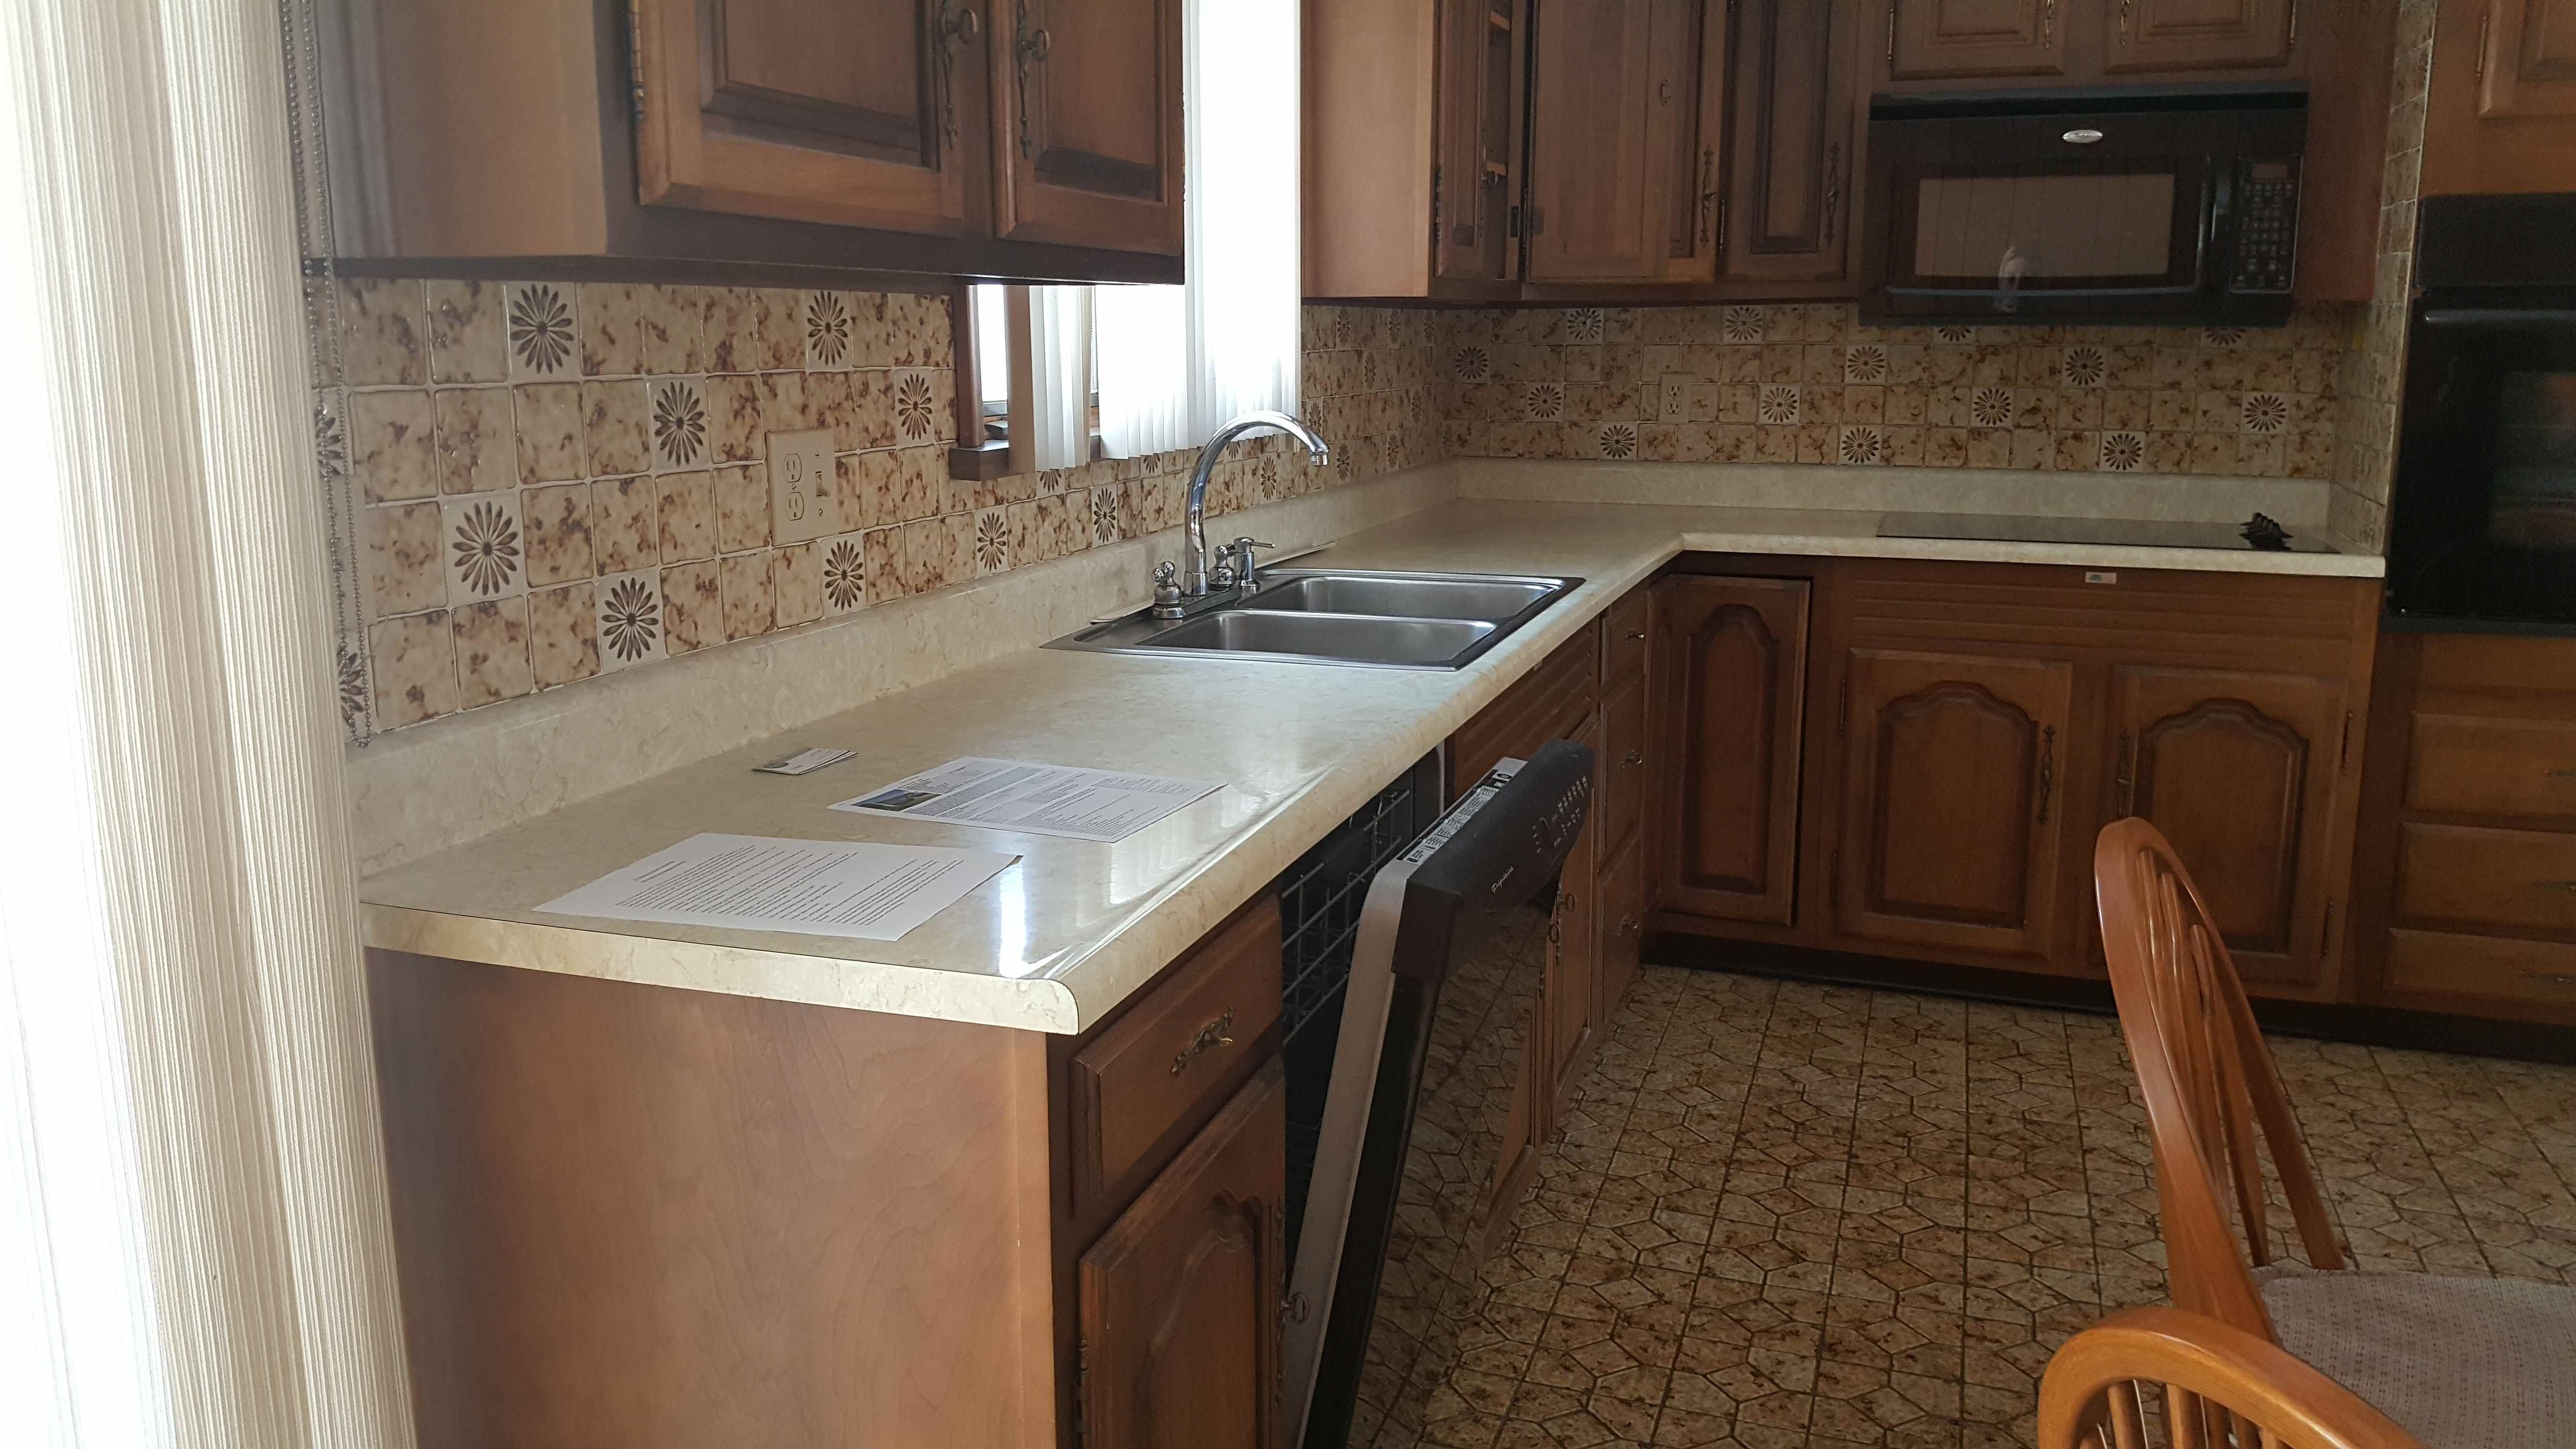
Our 1979 kitchen was next on our list of projects. We didn’t have the budget to rip out cabinets or replace the countertops, and wanted to wait to replace the backsplash until we could take on the whole project at once.
While doing research, I found an option - painting the backsplash with enamel paint. At first I was apprehensive that it may not look great or hold up, but I did some research and found that some bloggers had a great result that stood up to wear and tear. So, I followed the basic instructions on the 11 Magnolia Lane blog. Her results turned out so fantastic that her kitchen was even featured in Better Homes and Gardens! Since Hometown Ace and most other hardware stores don’t do any tinting of enamel paint, I bought a quart of plain white and a small jar of almond, and mixed a few spoonfuls of almond into the white in a separate, unused container very thoroughly until I got a creamier white color. I’d highly recommend following her directions closely, and use proper ventilation.
At the same time as the backsplash project, we painted the kitchen walls and cabinets. We chose a blue-grey for the cabinets to give the kitchen some color and brighten it up, but also leave it neutral. We replaced the old 1970’s drawer handles with newer birdcage style black ones. I also replaced the floral fan globes with more modern ones, rather than replace the whole fan.
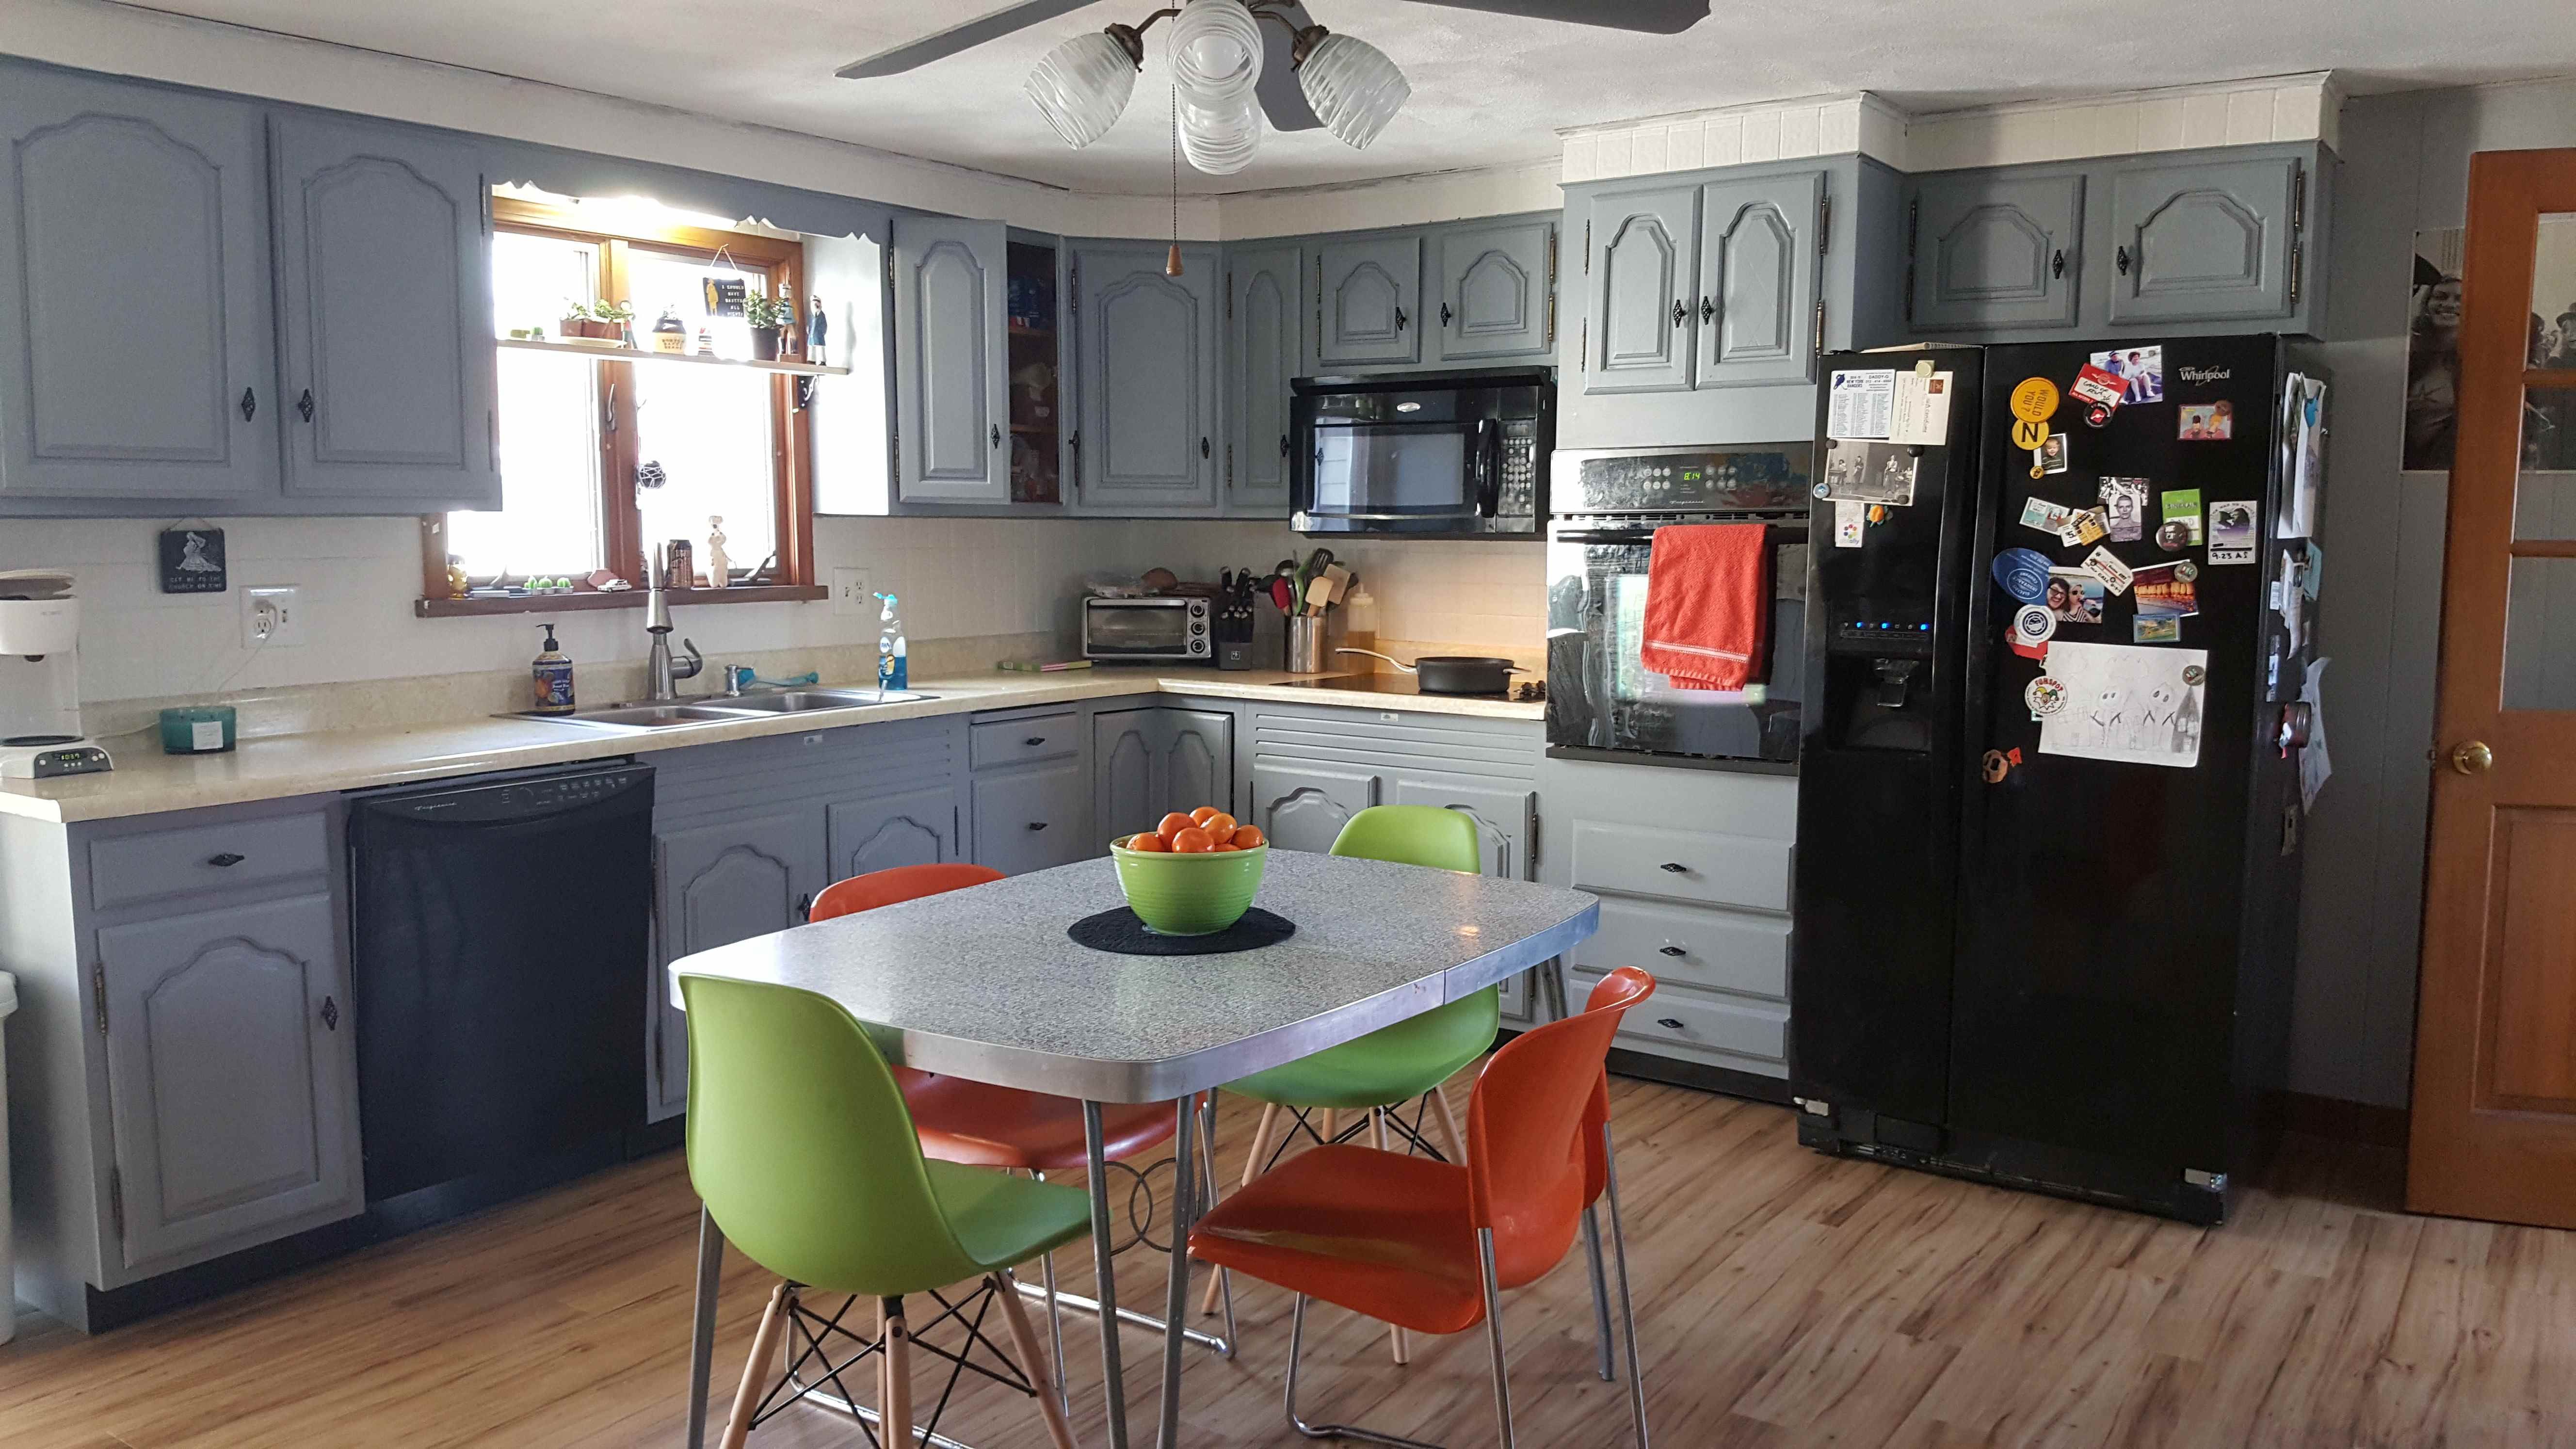
Our kitchen floor required some extra help - the original ceramic tile would have been a nightmare to pull up, and at one point a renovation to change an existing porch into kitchen space had resulted in some floor settling. This was going to be beyond my ability to fix, so we called Glover’s Floors, who gave us great advice and skimcoated the bumpy, loose 1970’s ceramic and put a luxury vinyl plank on top that was forgiving of the settling. The end product looks absolutely beautiful, and is durable and water resistant enough for a family with pets, two boys, and a very well used kitchen!
Project 3: Hollow Core Door Makeover
Old, inexpensive hollow core doors can bring down the value of your home - and they also can look dated and tacky. Replacing doors is a fabulous way to spruce up your hallway, but it can get costly quickly, with more modern looking 5-panel doors in the $150-200 range, plus the cost and hassle of using a template to correctly plane where the hinges and knob will be.
We had a hallway with four of these hollow core doors with very worn brass knobs, and I knew replacing them would be a good winter project. I didn’t trust myself as a DIY-er to install a new solid door slab correctly, and of course, knowing your limits and what you can handle is smart when your home’s at stake.
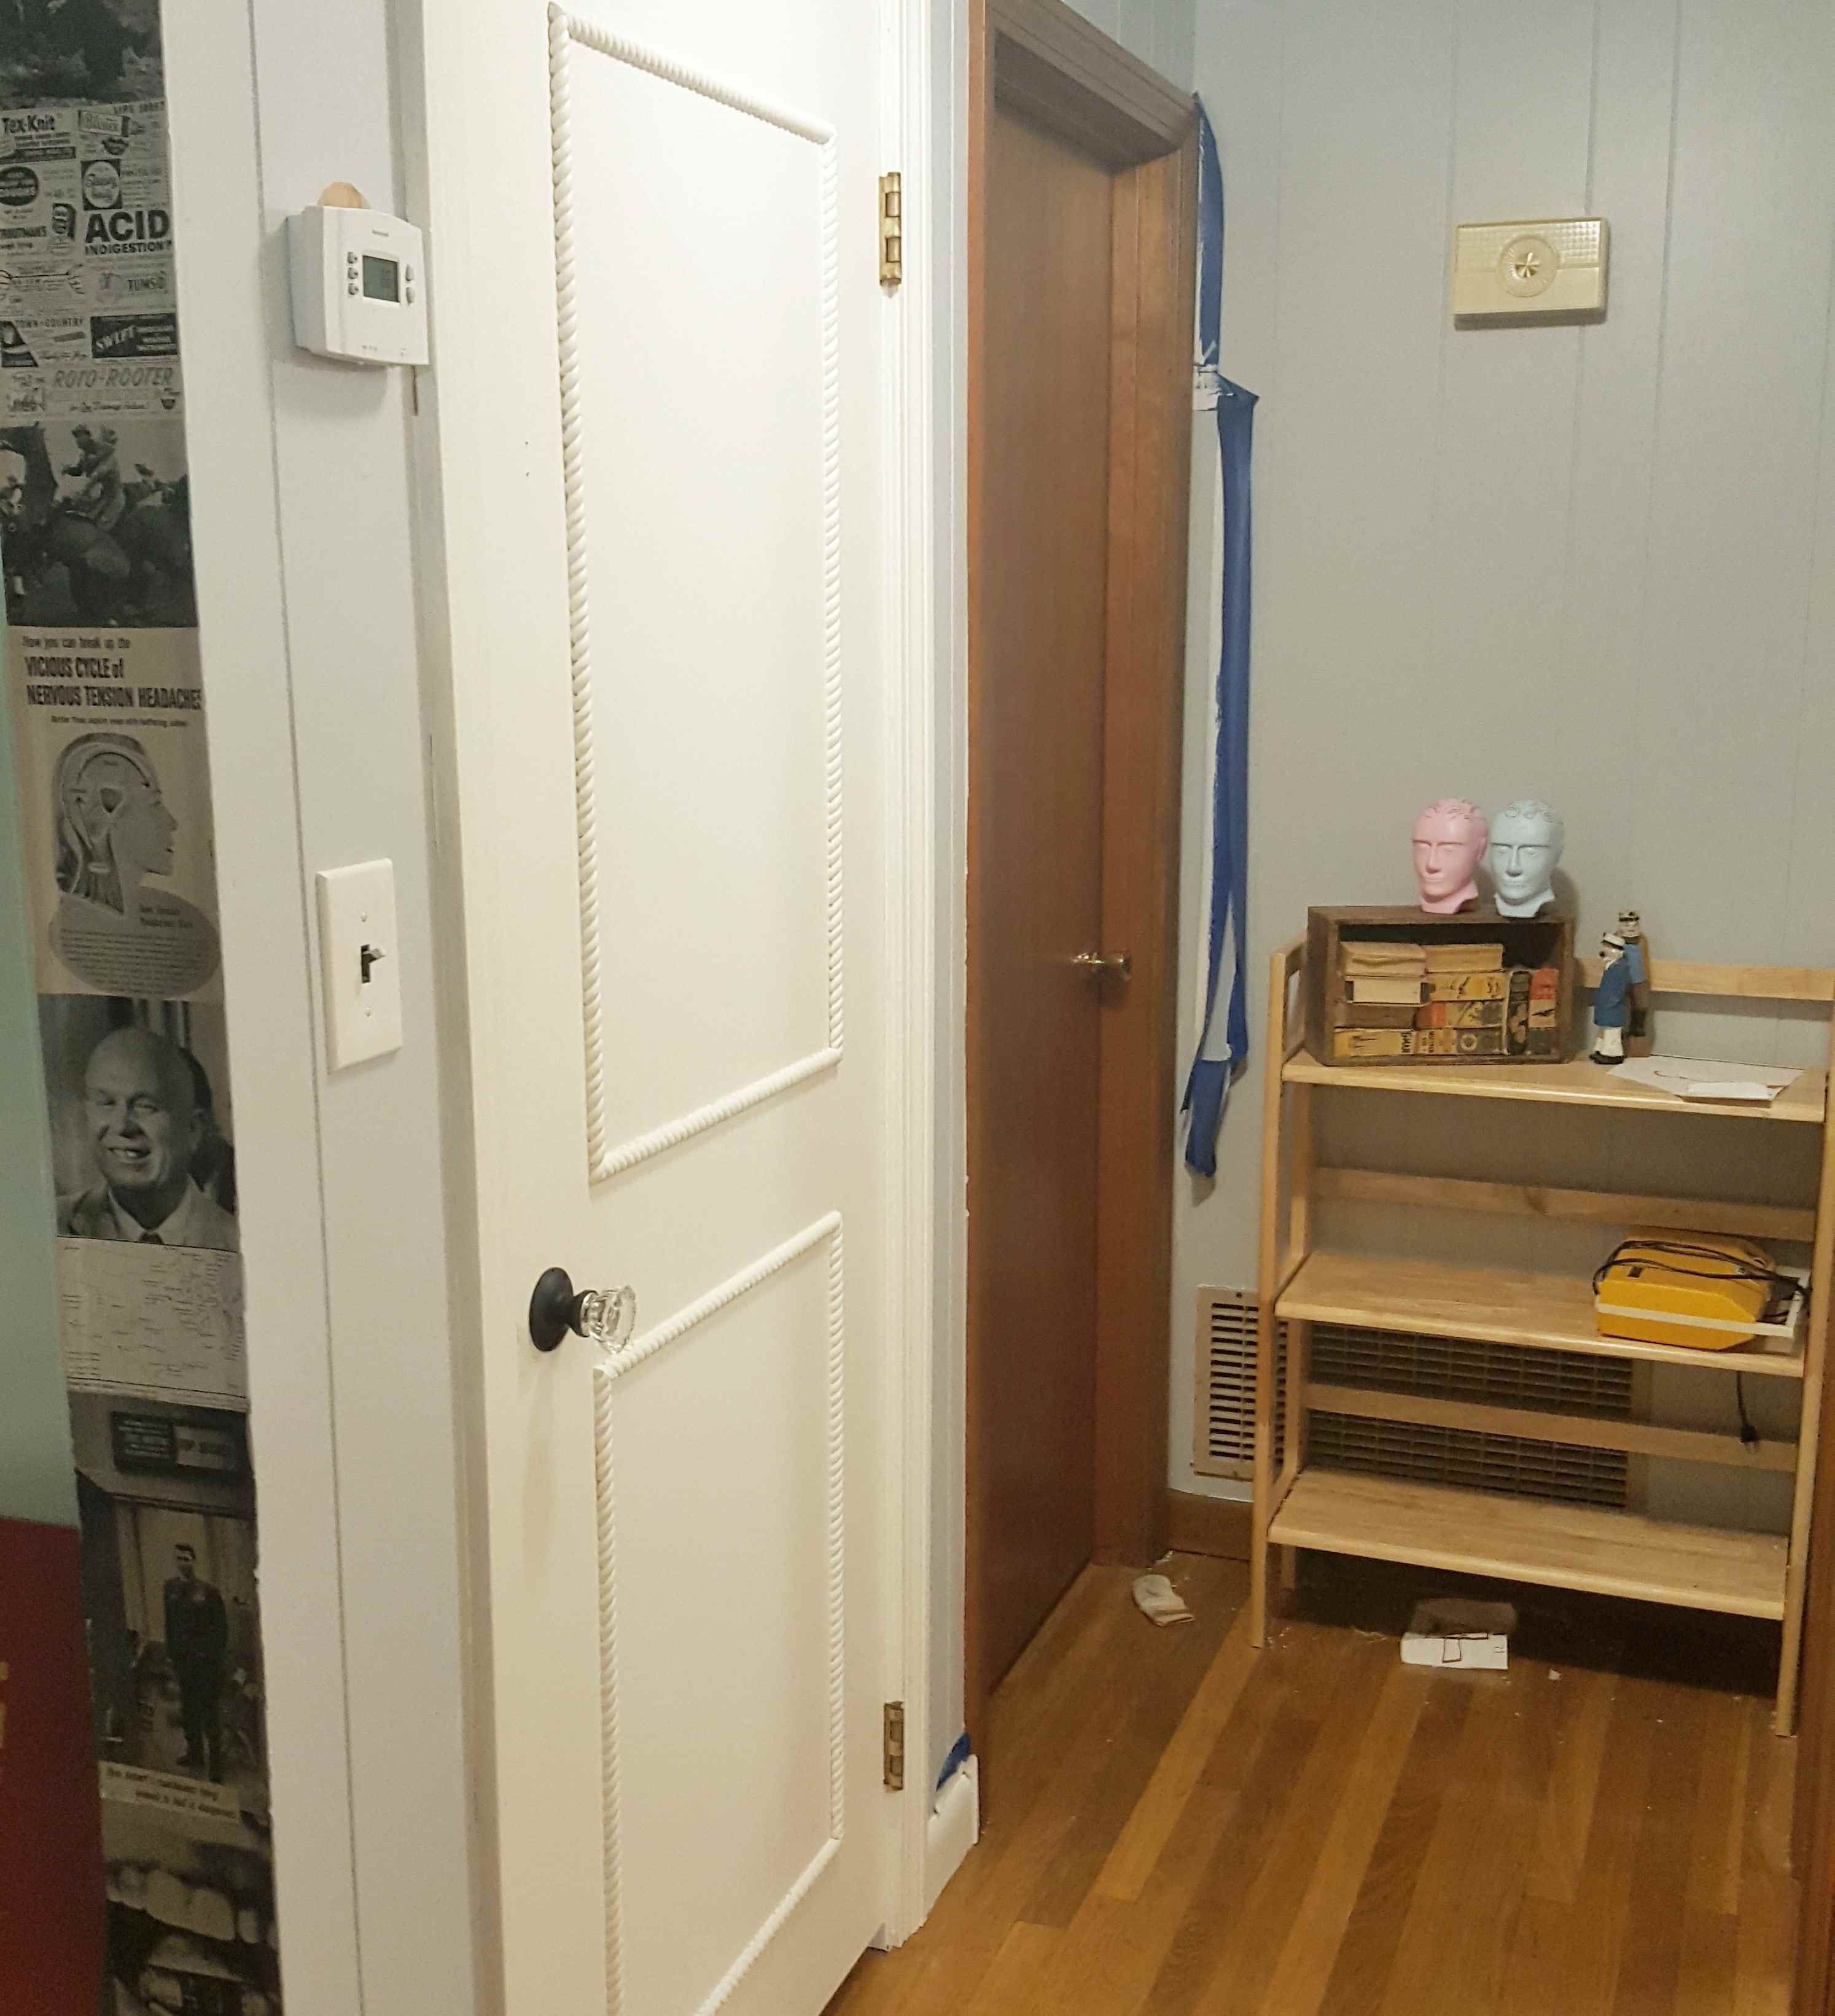
Luckily, Pinterest came to the rescue and I pulled off a really pretty DIY project that I customized myself, and my home looks so much better just with this small amount of updated detail! I found a blogger that had done something similar to what I was looking for - I used her instructions, but I used a higher priced rope molding to bring some Cape Ann flair to my house.
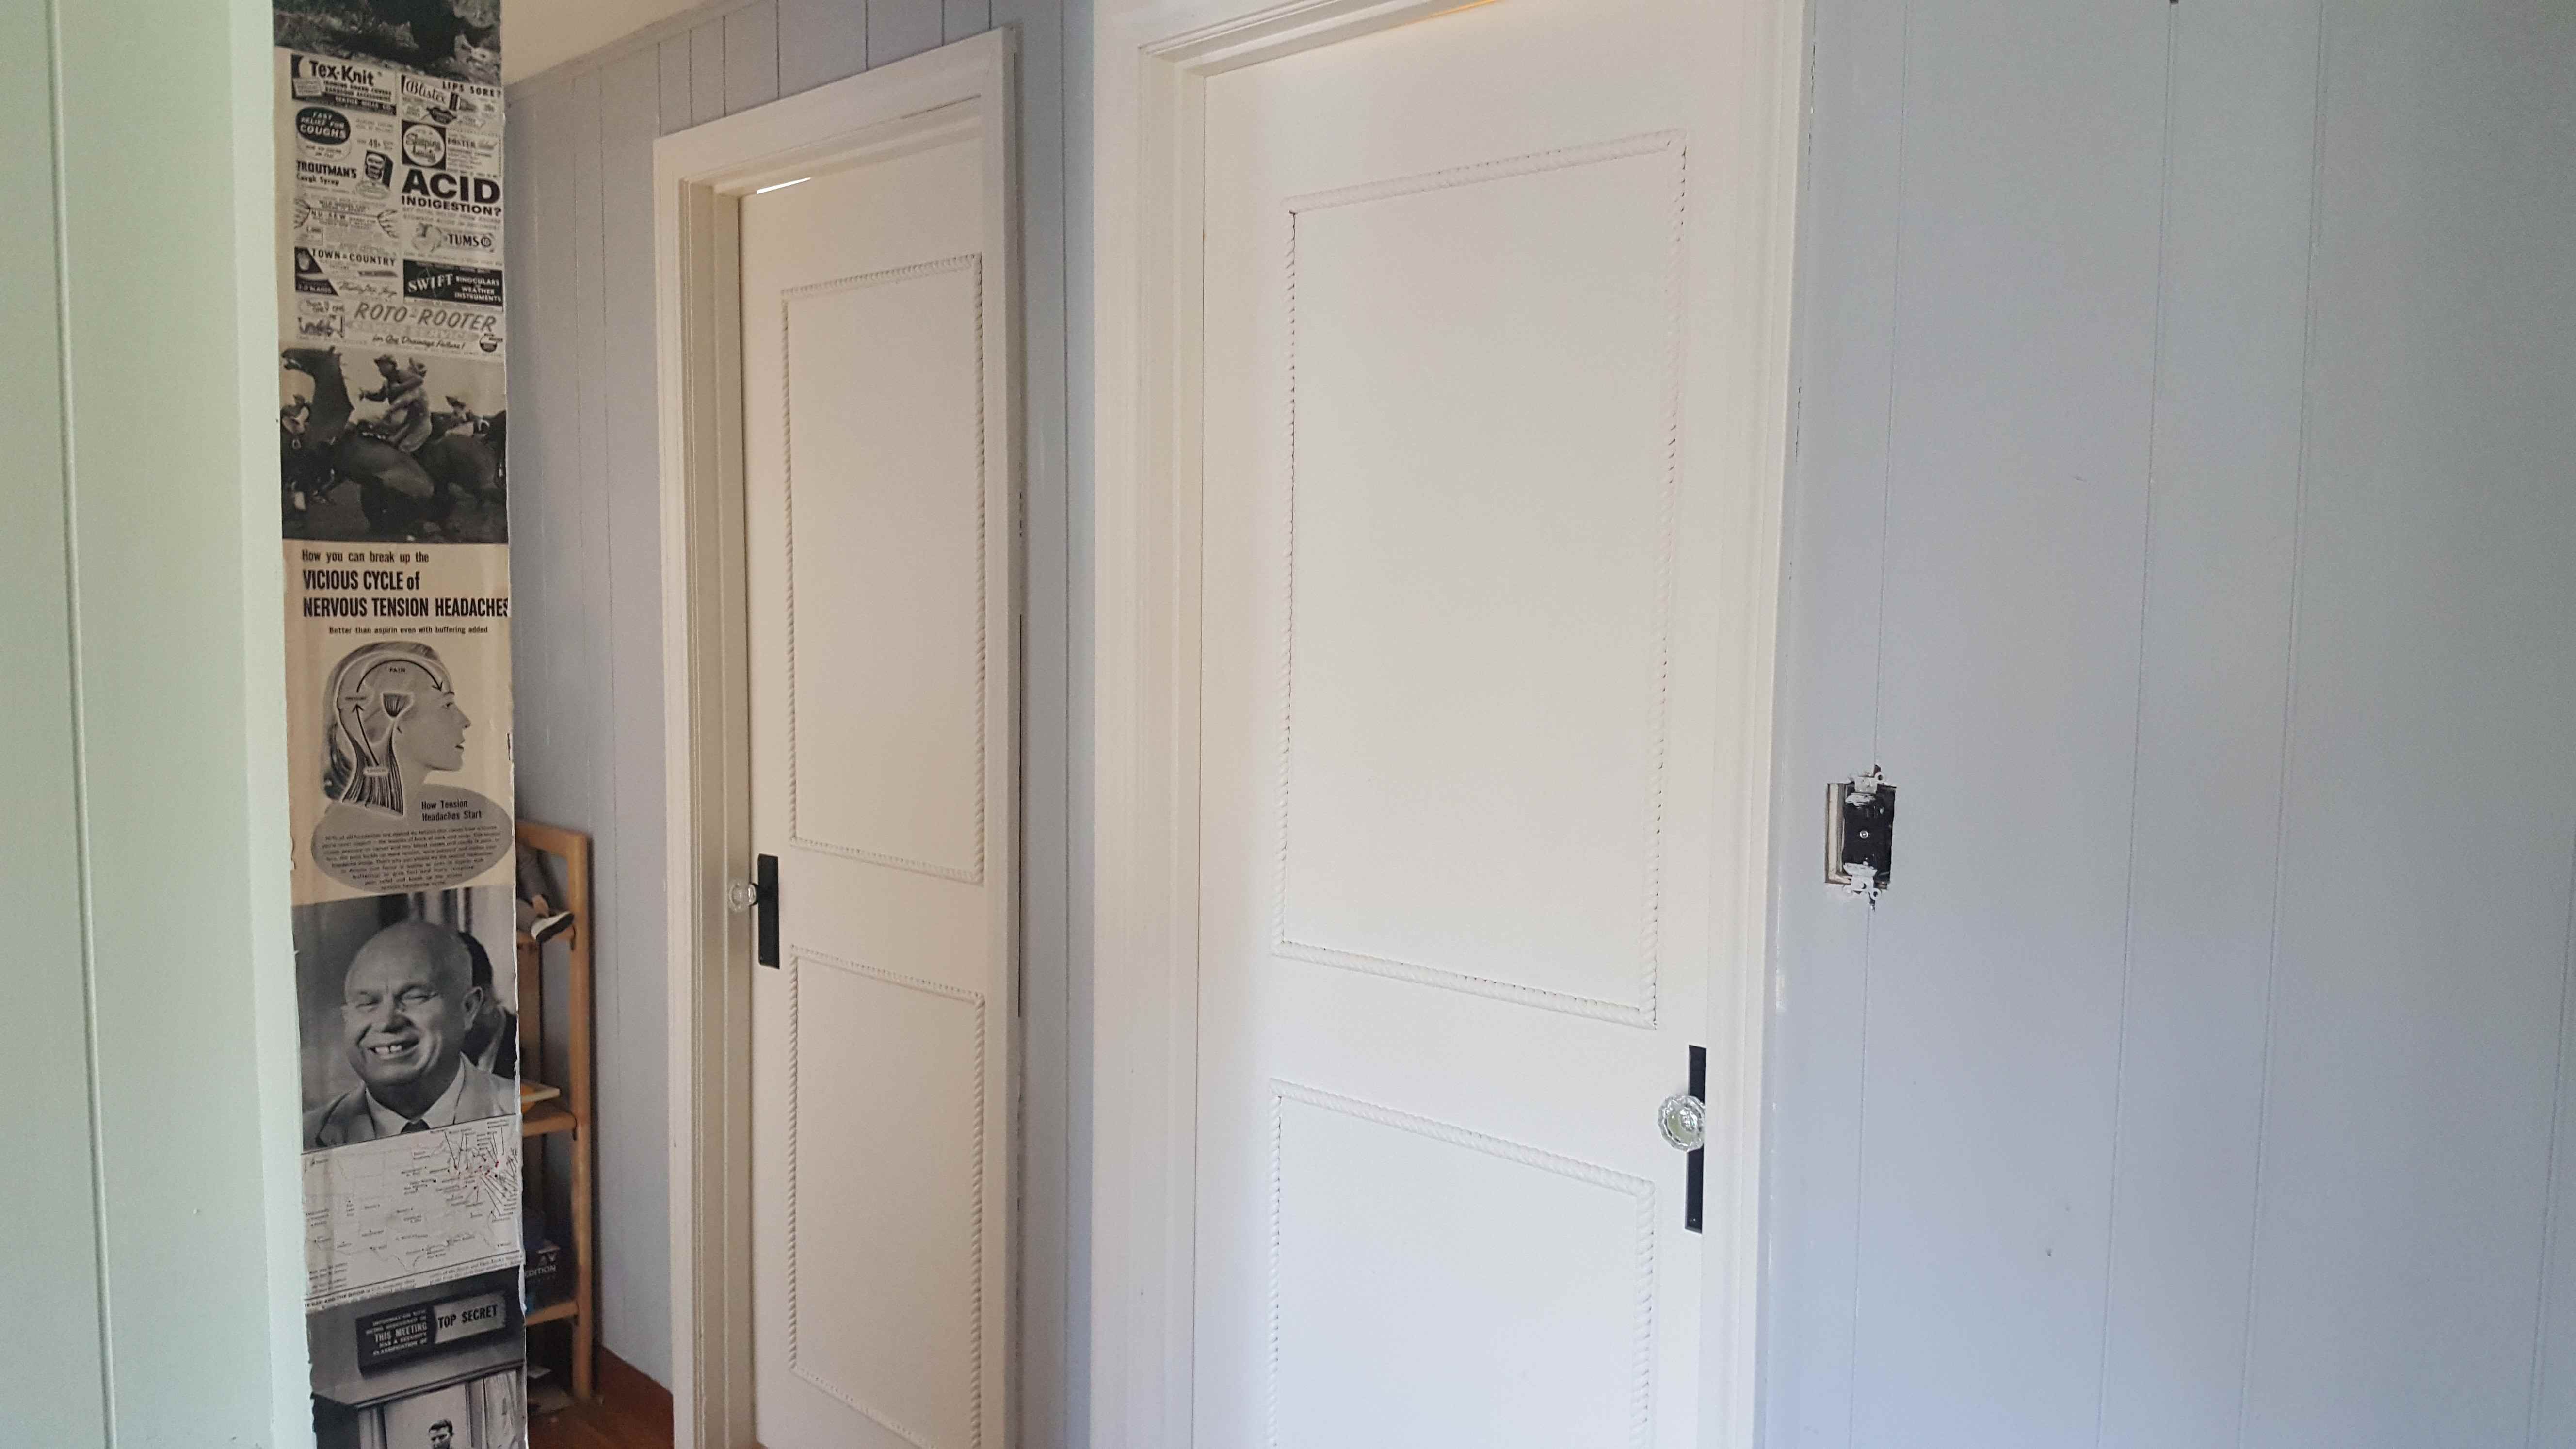
The doors ended up being about $50 each after all was said and done, but I love the way they look. I bought glass doorknobs and escutcheon plates (which needed to be spray painted black to match) on Amazon, at about $25 per door.
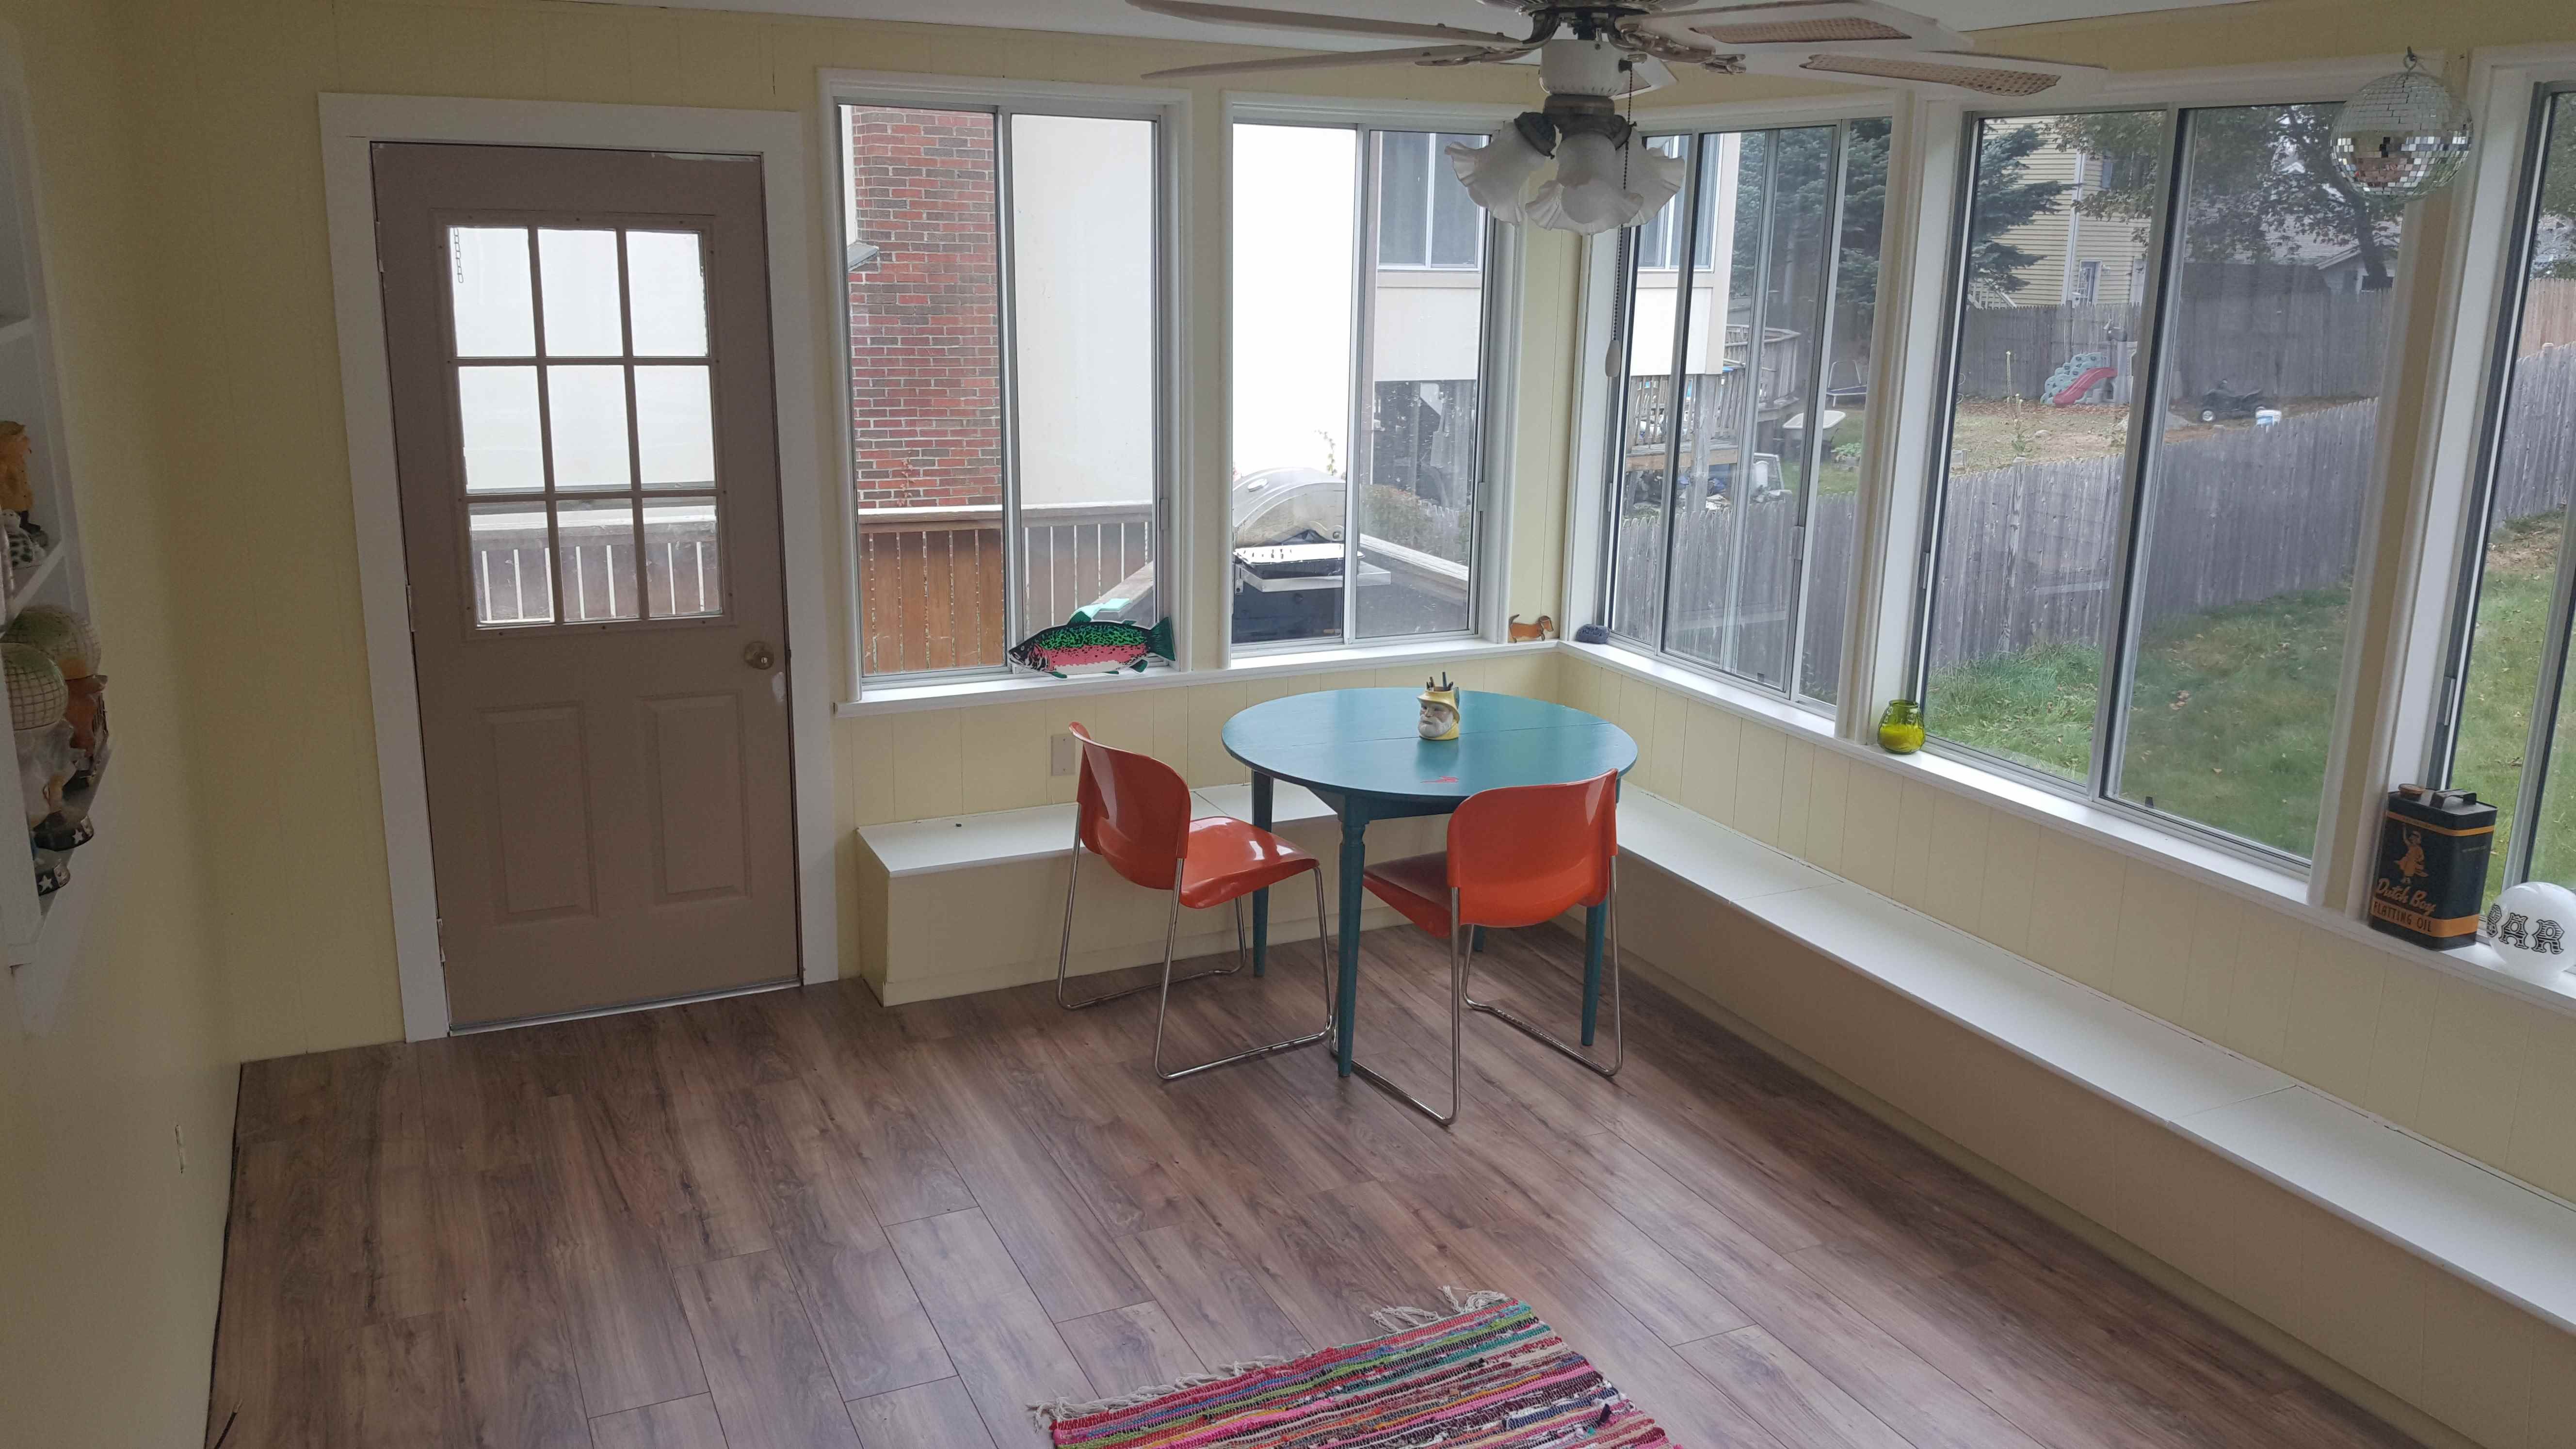
Project 4: A Porch Makeover with Inexpensive Flooring
This project was another paint-heavy one, but also involved putting down new flooring! Our beautiful three-season porch also had faux wood paneling and 80's blue-grey berber carpeting.
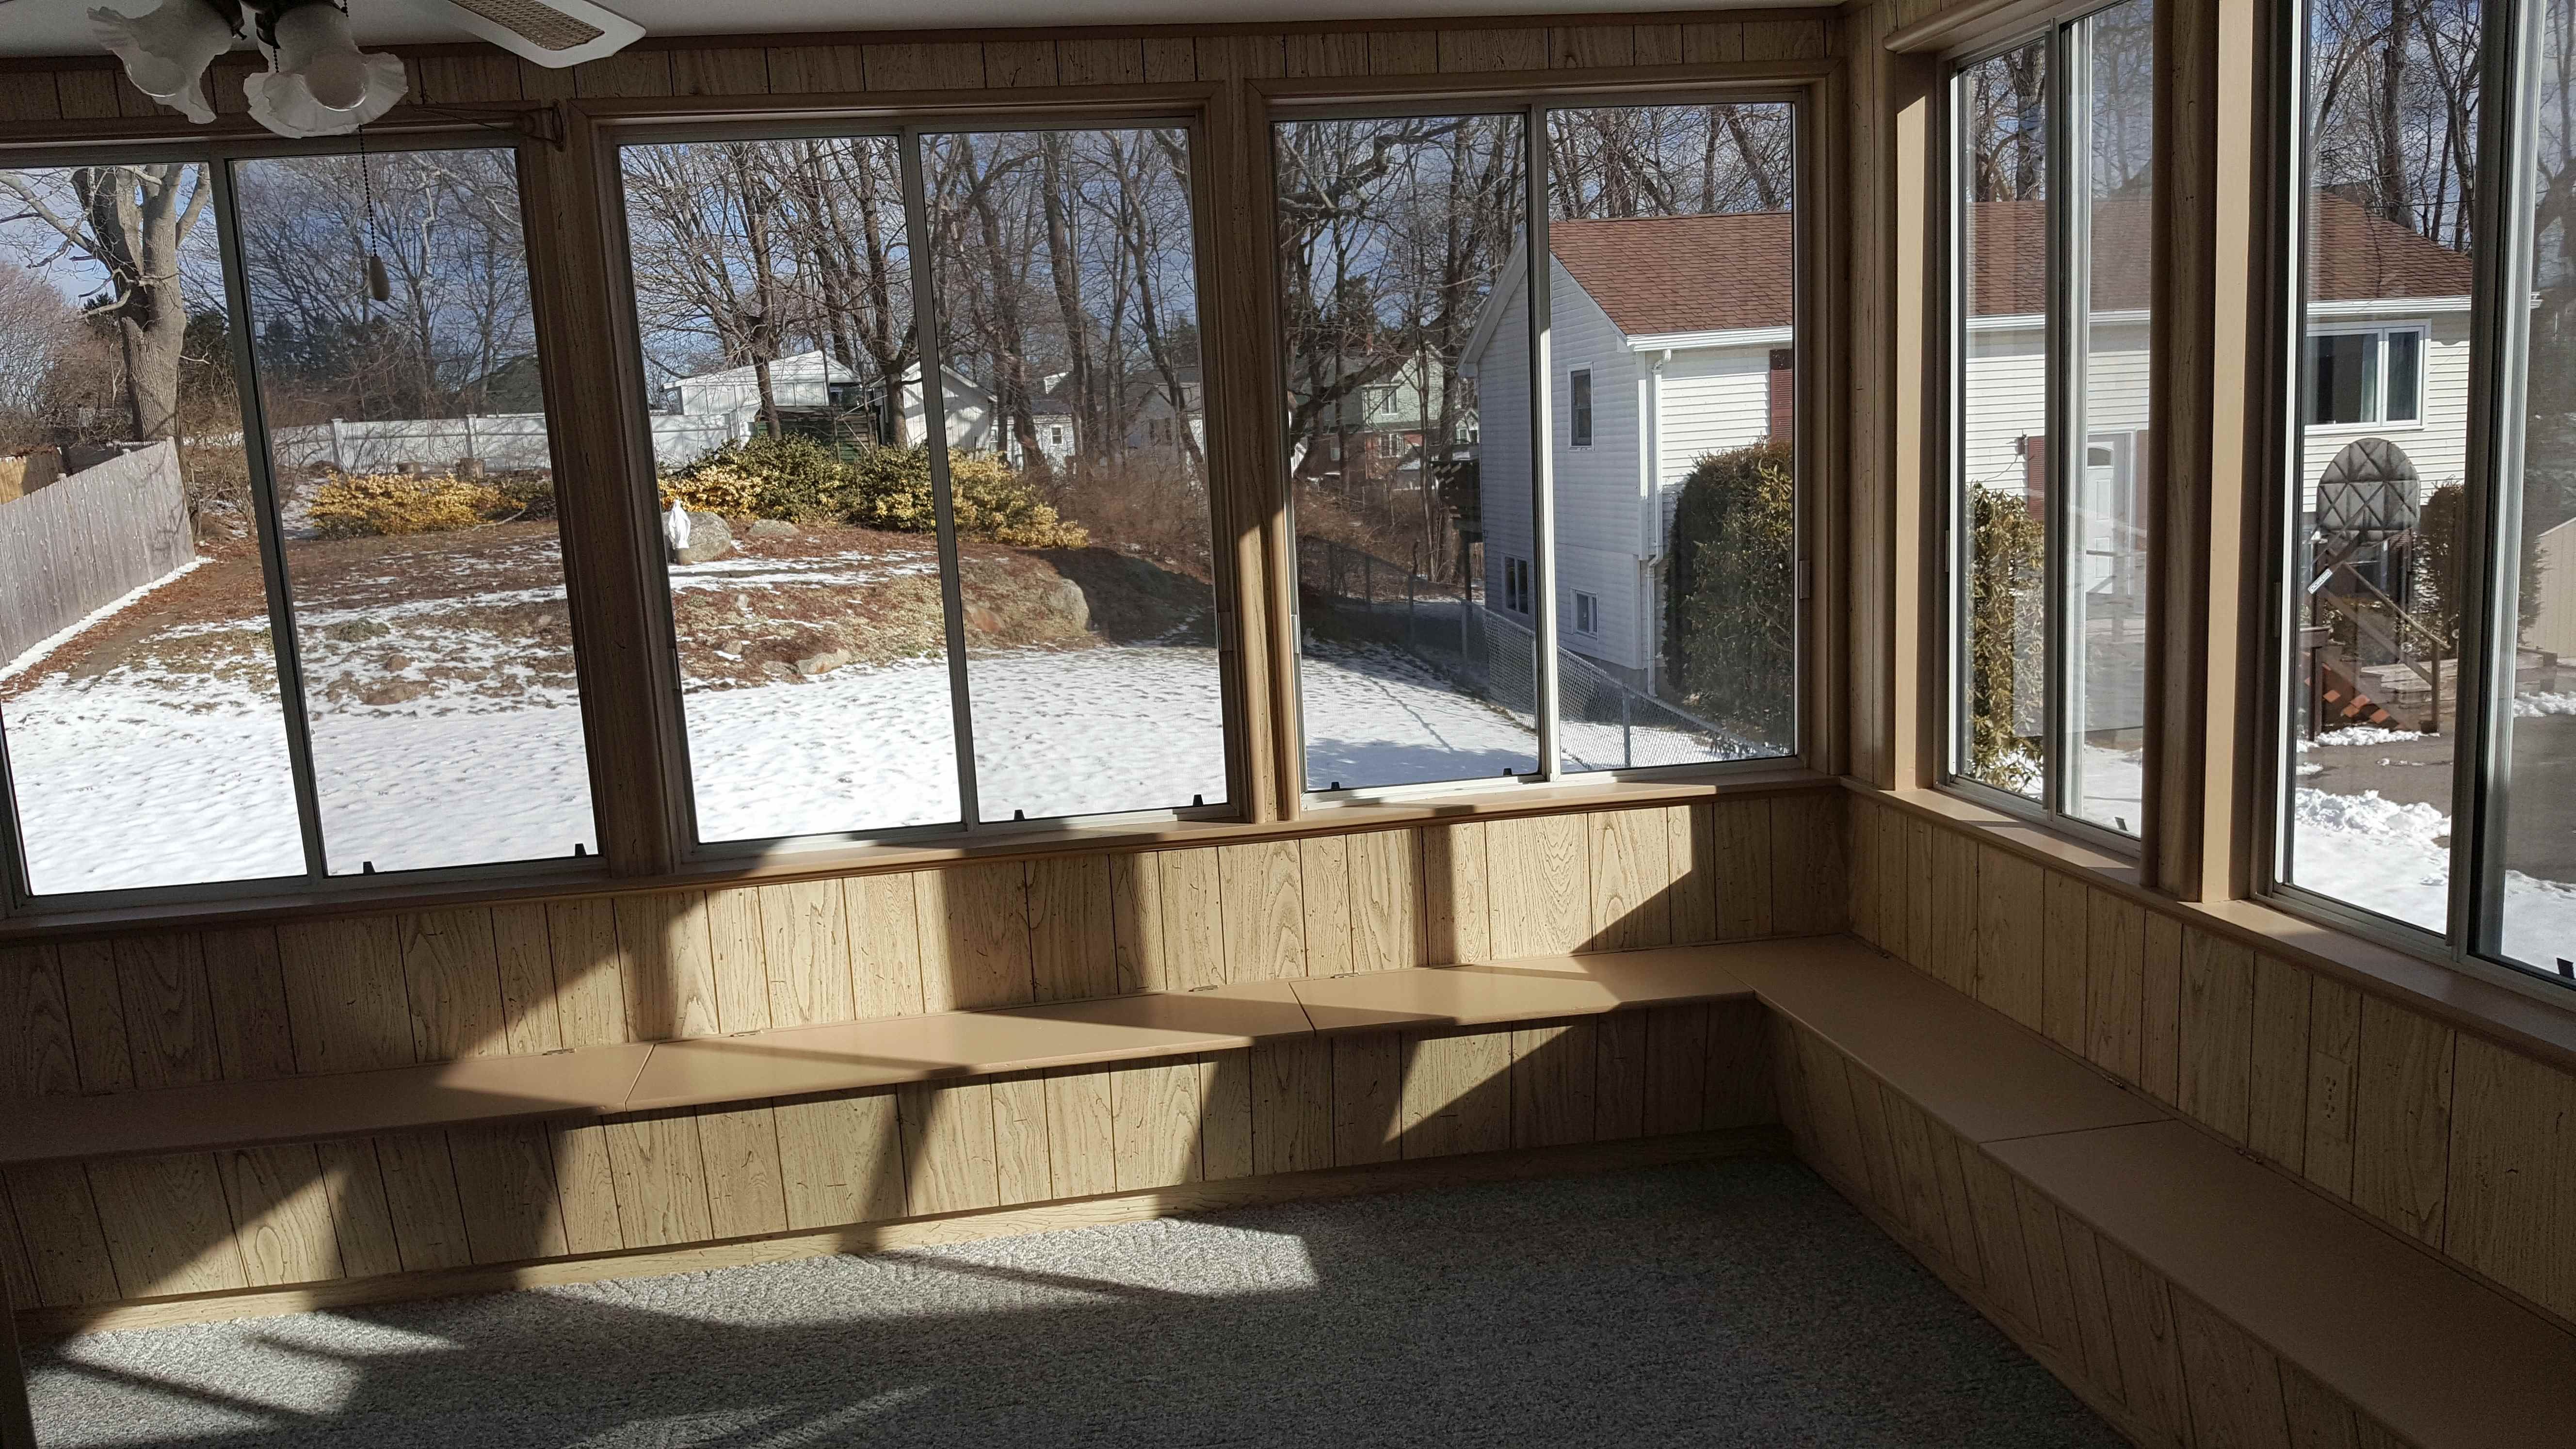
It also was built with some spots only having particleboard, and as a result of years of weather, got to a point where it broke and you could step through the floor! It needed to be fixed by removing the bad subfloor and replacing with new layers of plywood. This was done by a local contractor, and once the new plywood was installed, I handled the flooring part myself.
I’d researched inexpensive laminate and found that a big box store sold a German-made wood look click-lock laminate for $.79 per square foot, and the reviews were great! So I picked up enough for the porch, plus paint for the windowsills, trim, and walls.
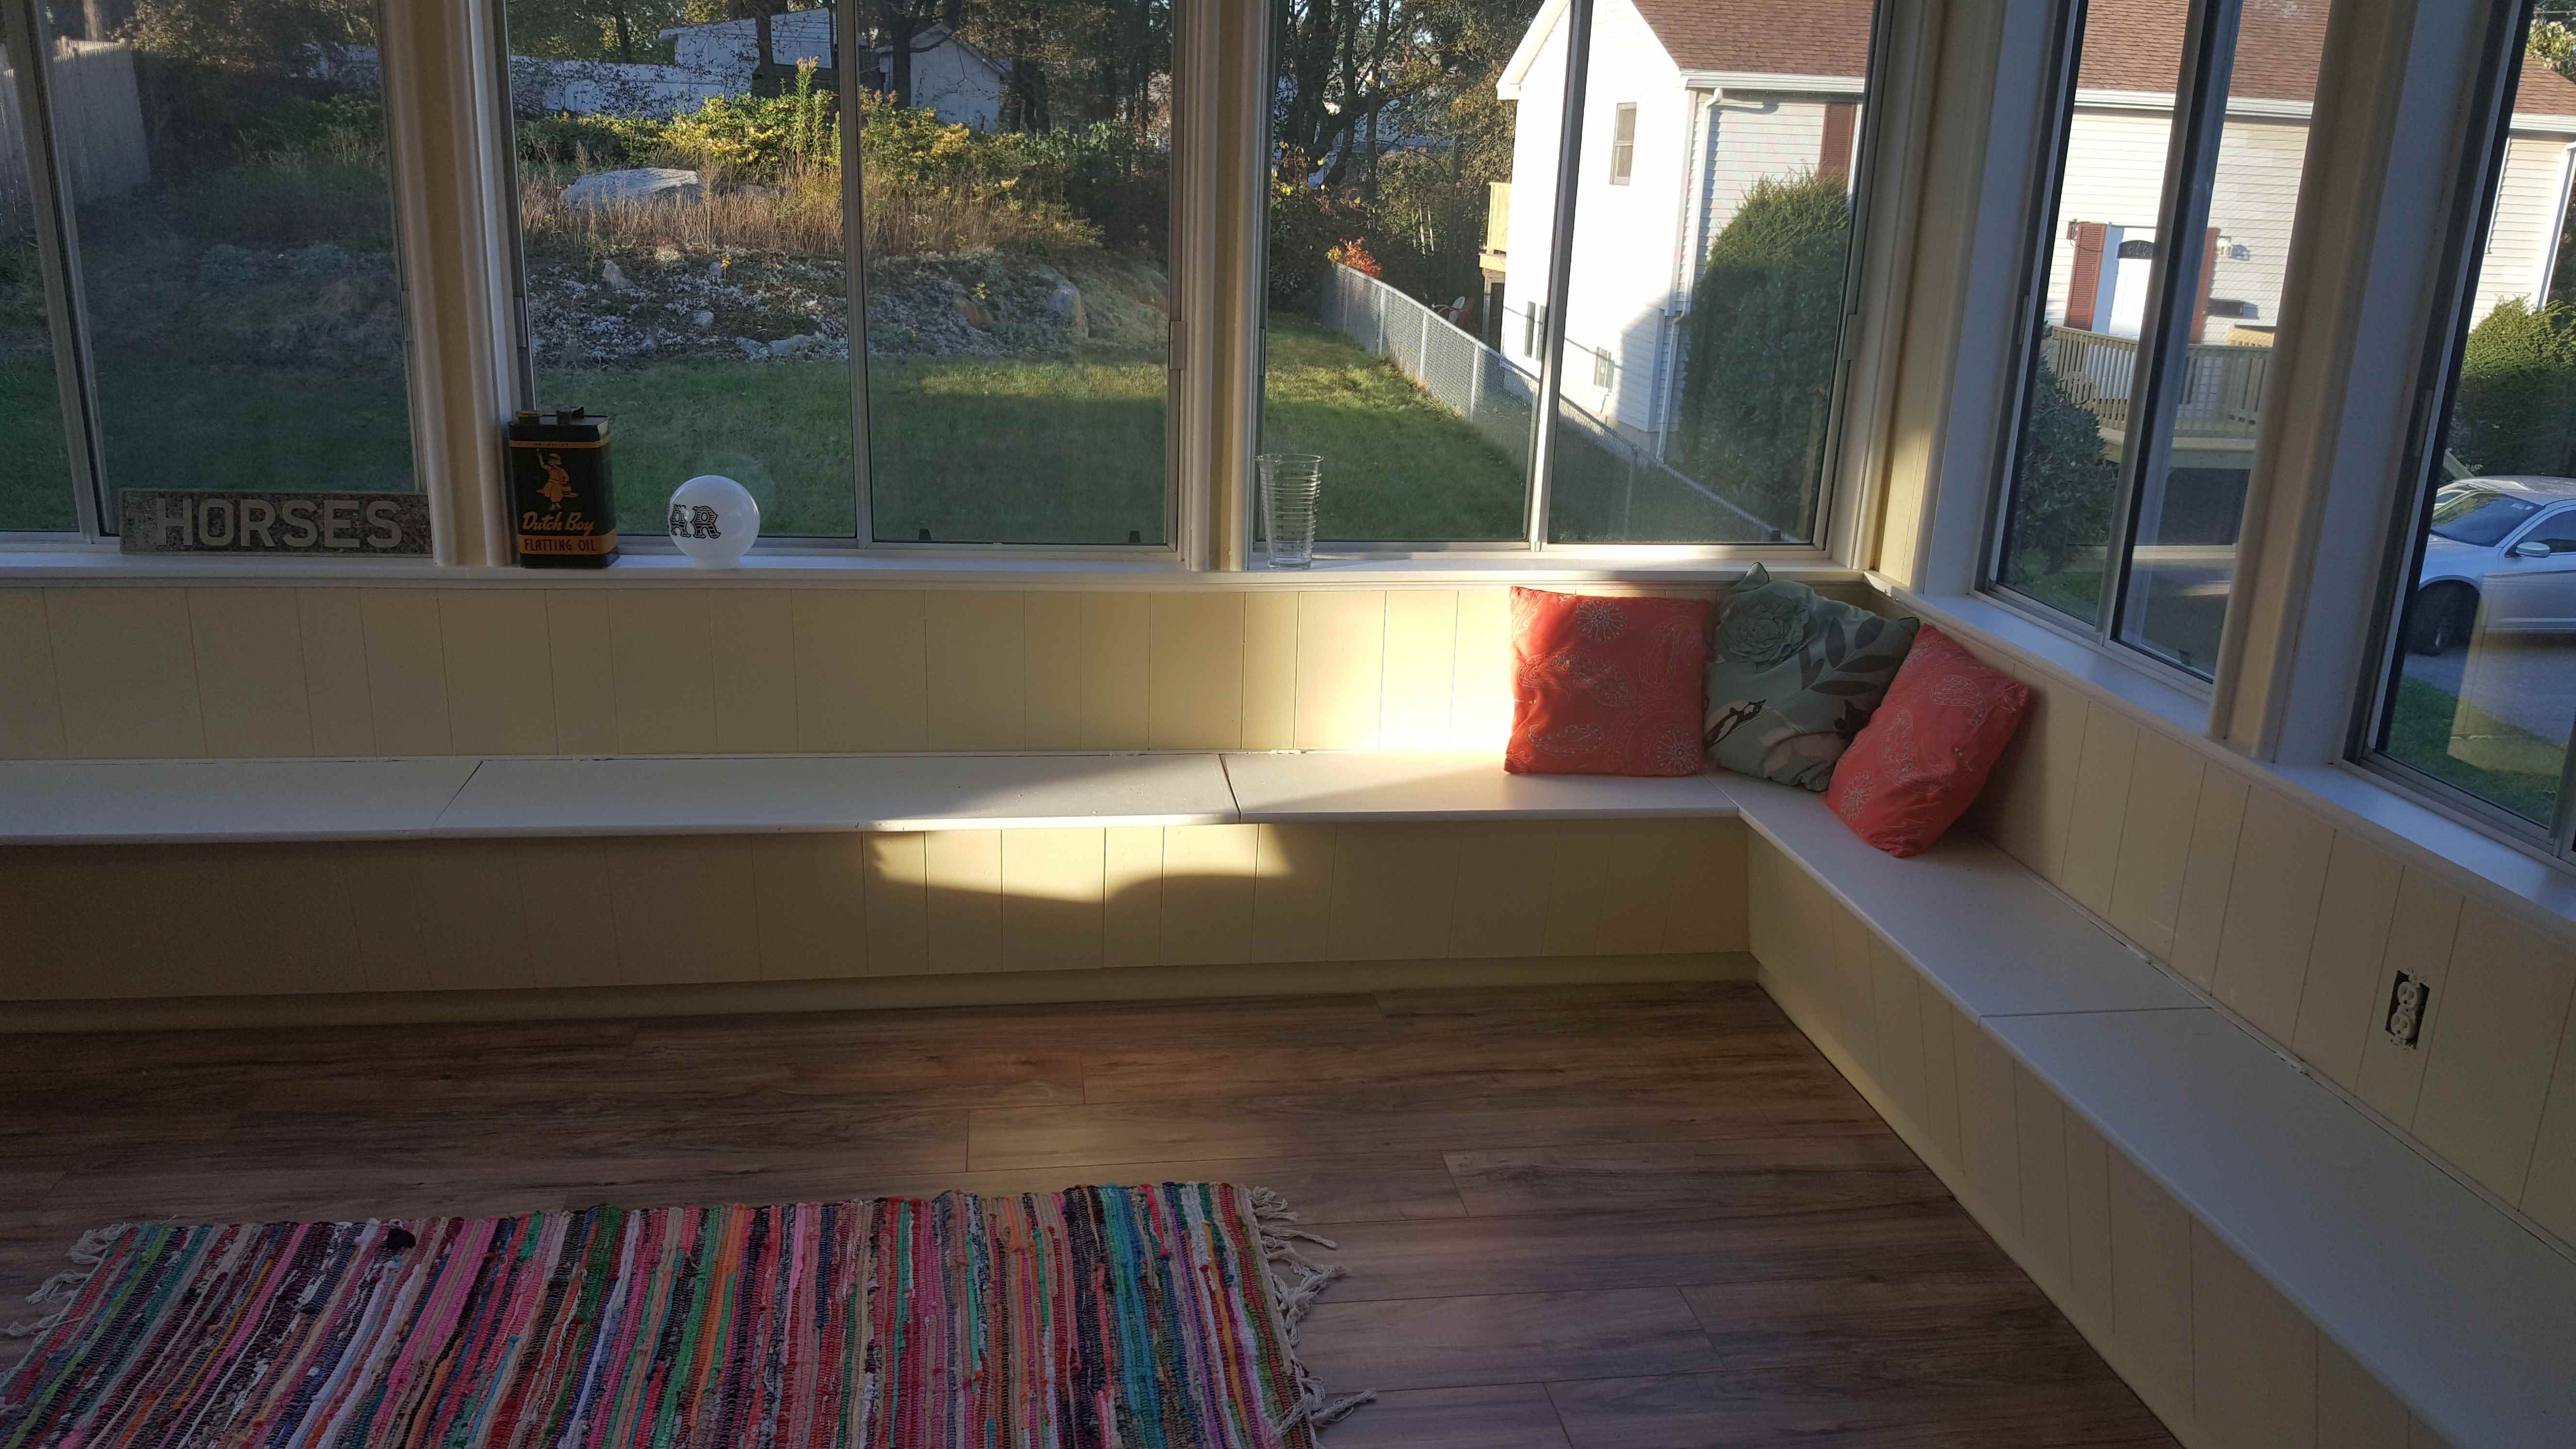
Laying the floor took a full weekend and then some, mostly because it involved a lot of cutting with a circular saw and a learning curve - it was my first ever flooring project! However, the entire project - floor and walls, as well as painting - took a few weeks of occasional work, and about $400.
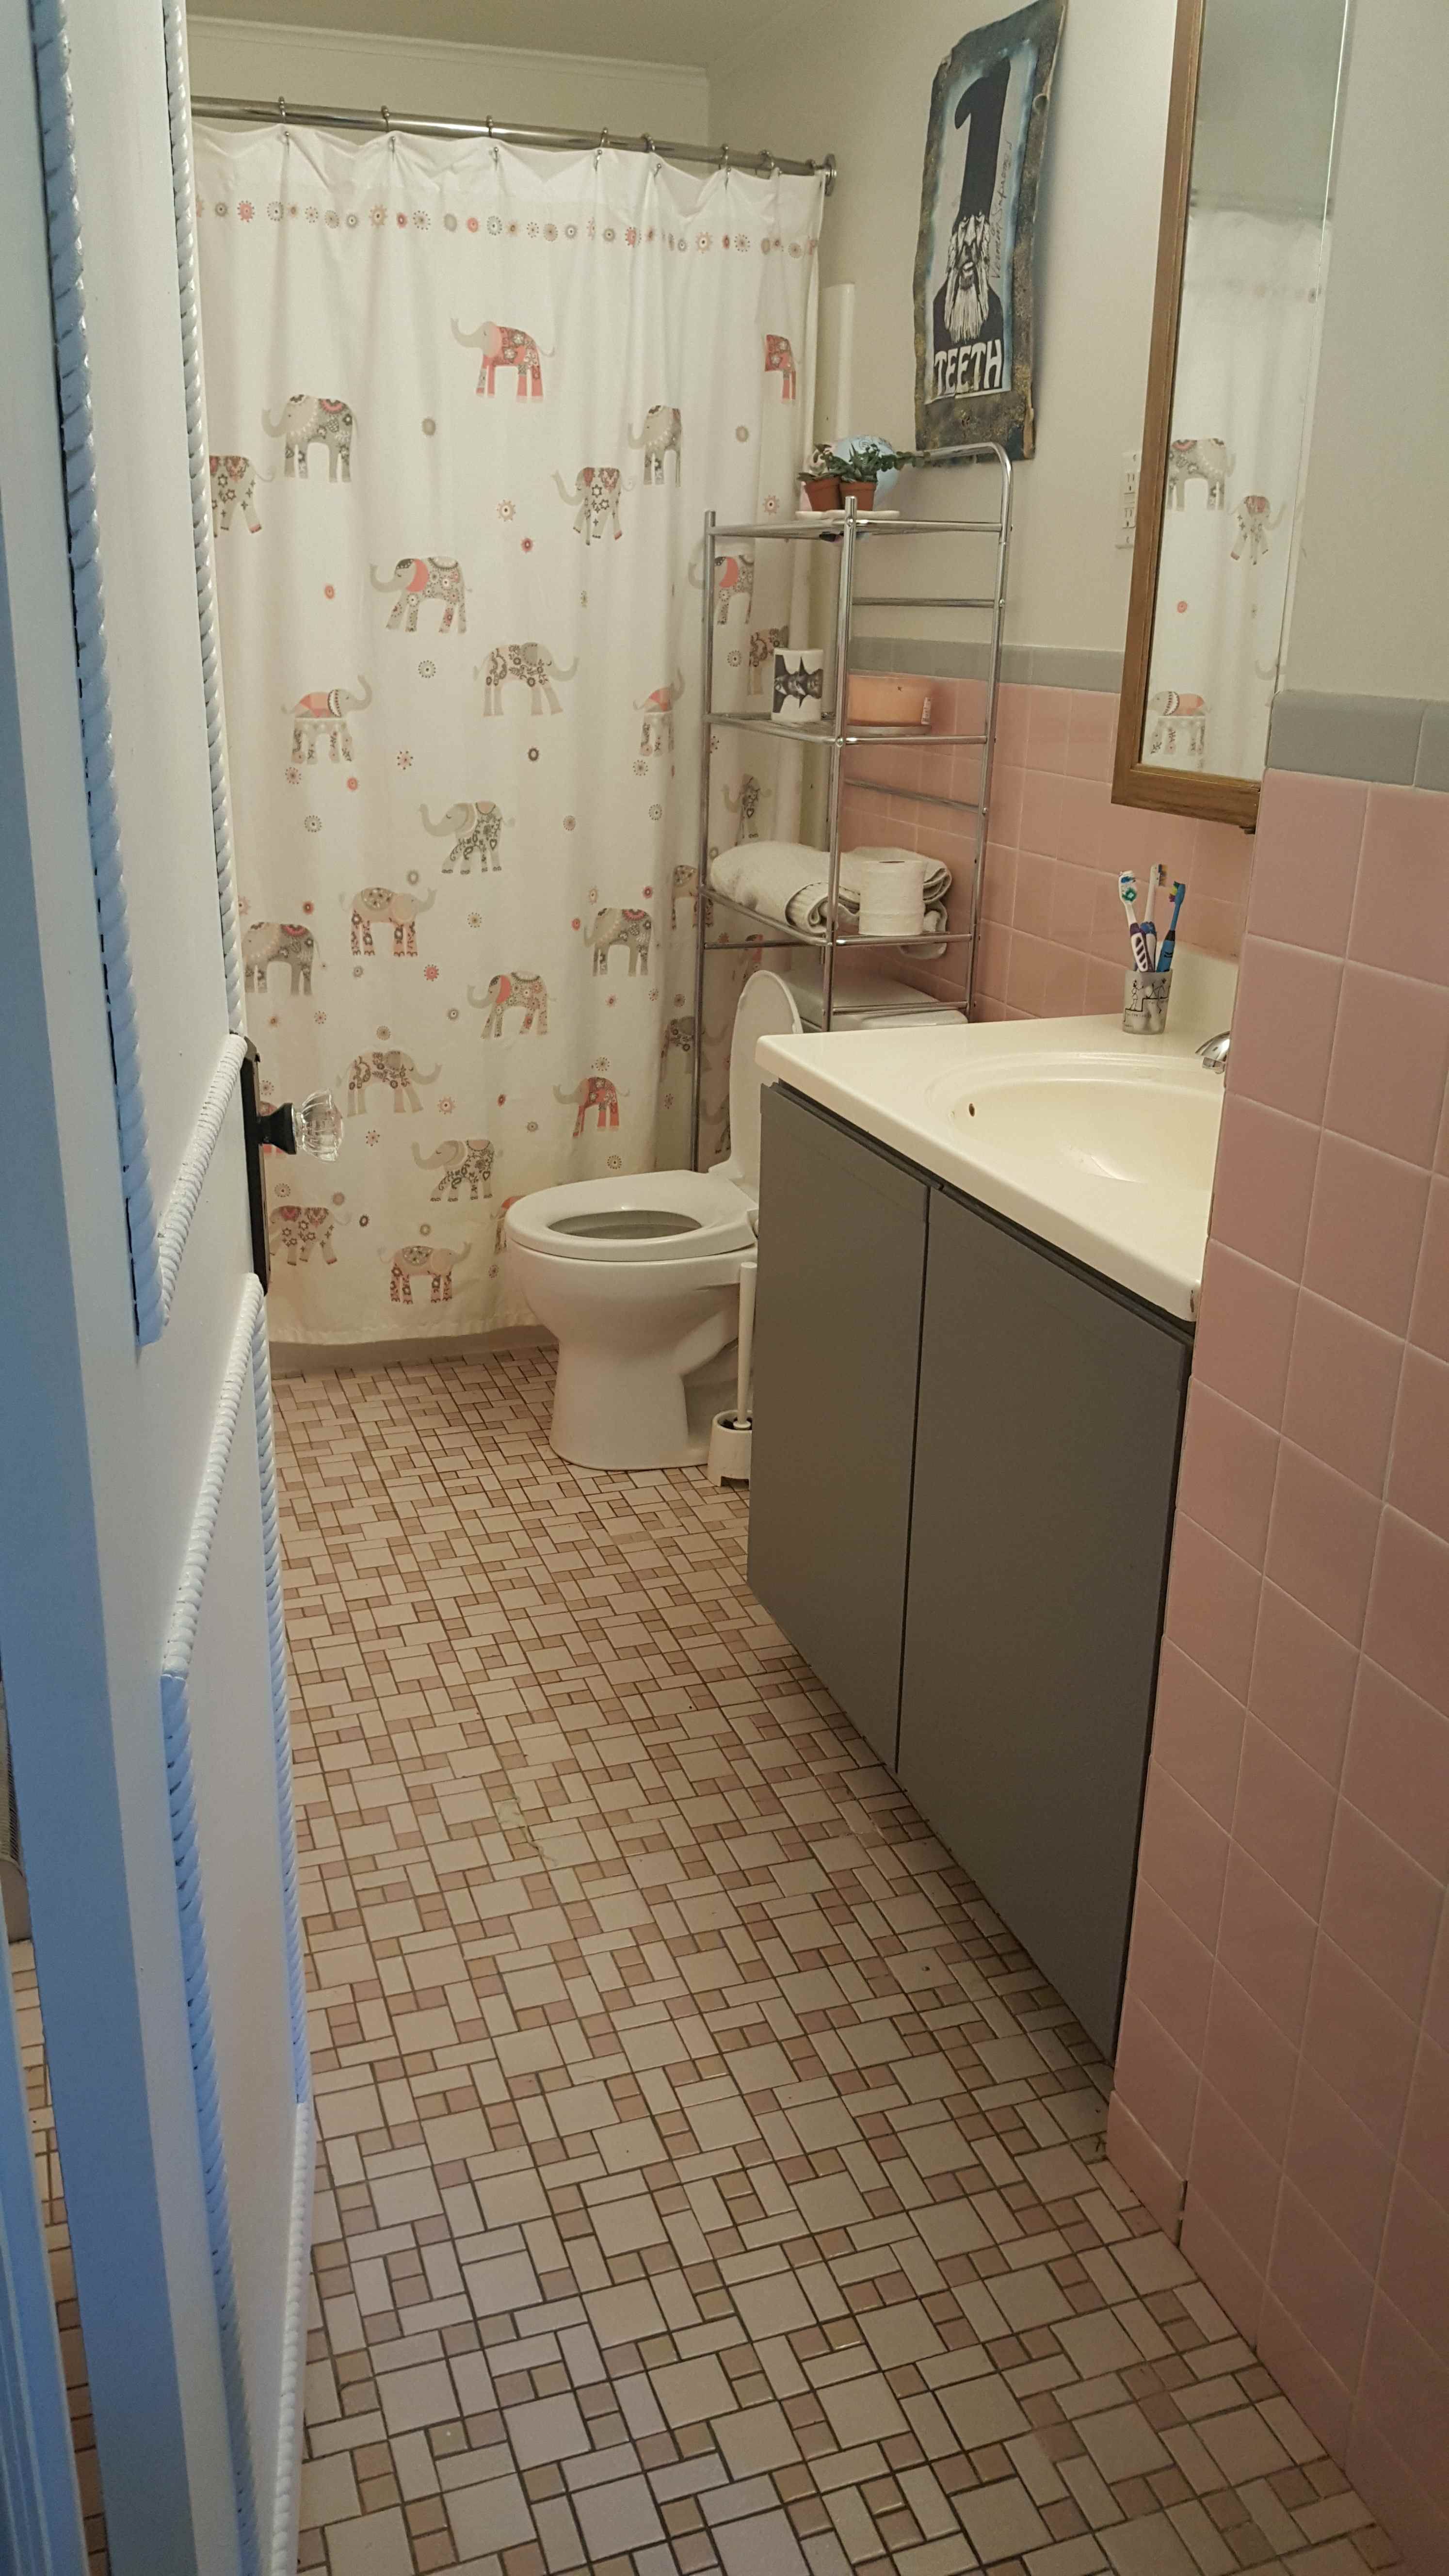
Project 5: Small Updates to a Vintage Bathroom
When we posted pictures of our home when we bought it, several people told us we’d better not rip out the pink tile in the bathroom. We didn’t want to!
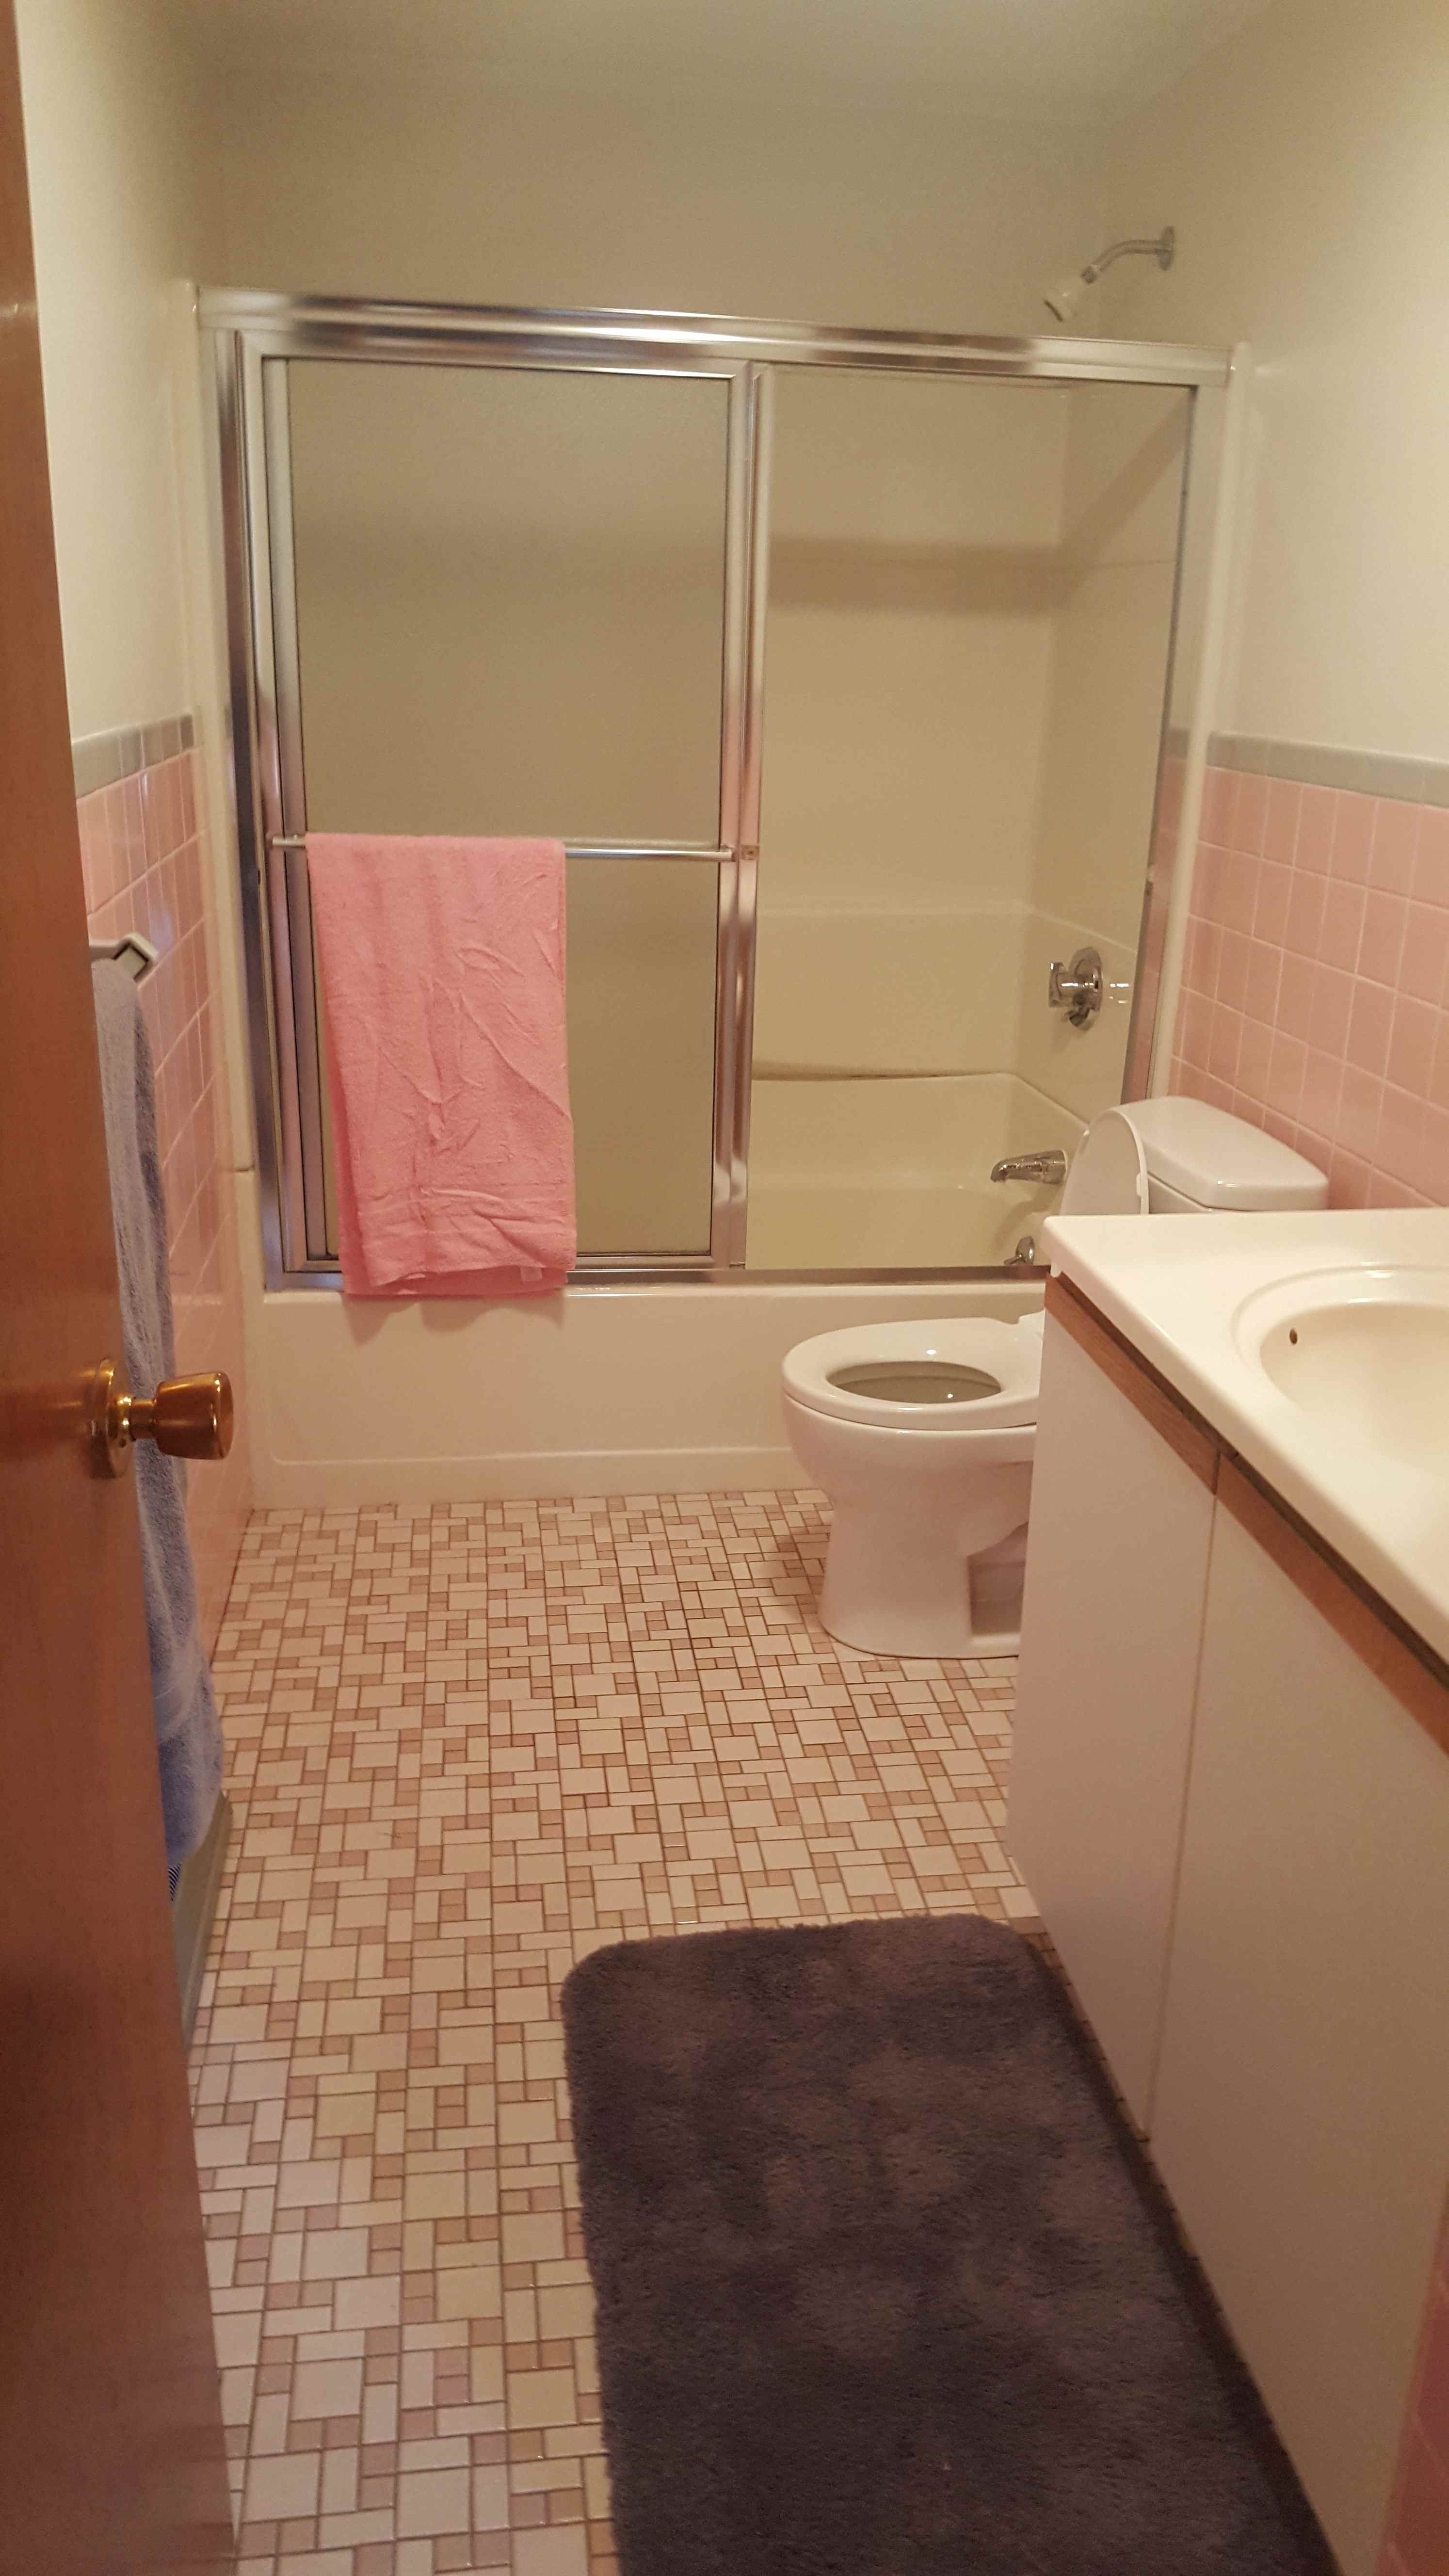
While maybe someday we will upgrade the entire bathroom, I’m a huge fan of keeping what is functionally working, and also of 60’s and 70’s vintage decor. However, there were some small changes we wanted to make to the bathroom. The first problem was the sliding shower door - the tub and shower aren’t very spacious, and within the first month one of my young sons had slammed his hand in the door, and we’d smacked our elbows into it several times. So, it had to go.
It was easier than I thought! I tackled it myself on a day off. I was able to take out the screws and use caulking remover I found at Hometown Ace - as well as a new transparent waterproof caulking to seal up the screw holes so moisture from the shower couldn’t get into the walls and subfloor. I then purchased a curtain rod that was curved outward to give us more headroom, and a fabulous shower curtain that matches the gray and pink.
The vanity was chipped and aging, and was likely updated in the late ‘80s or early 1990s, and was made of particleboard. I used a small paint sample of gray to paint the vanity and doors and added knobs. While eventually we’ll replace the vanity and mirror, this was a small update that cost less than $10 and an hour’s worth of work.
While there’s many more DIY projects to plan for the future, I can’t believe how a few weekends of sweat equity and a few hundred dollars per room can change the look of an entire house!